You are viewing an old version of this page. Return to the latest version.
Difference between revisions of "Oojeema Pro Expense Job Aids"
(Tag: Visual edit) |
(Tag: Visual edit) |
||
| Line 3: | Line 3: | ||
=====Managing Expense Transaction===== | =====Managing Expense Transaction===== | ||
| − | ======<span class="toctext ve-pasteProtect" style="box-sizing: inherit; font-family: "Open Sans", Roboto, arial, sans-serif; display: table-cell; padding-right: 1em;" data-ve-attributes="{"style":"box-sizing: inherit; font-family: \"Open Sans\", Roboto, arial, sans-serif; display: table-cell; padding-right: 1em;"}">Creating | + | ======<span class="toctext ve-pasteProtect" style="box-sizing: inherit; font-family: "Open Sans", Roboto, arial, sans-serif; display: table-cell; padding-right: 1em;" data-ve-attributes="{"style":"box-sizing: inherit; font-family: \"Open Sans\", Roboto, arial, sans-serif; display: table-cell; padding-right: 1em;"}">Creating Expense Transaction</span>====== |
| − | # Under Main Menu, Click Expense | + | #Under Main Menu, Click '''Expense'''[[File:Pro Expense Module (Create) - Step 01.png|center|950x950px]]<br /> |
| − | # Under Expense Menu, Click Create New Expense | + | #Under Expense Menu, Click Create '''New Expense'''[[File:Pro Expense Module (Create) - Step 02.png|center|767x767px]]<br /> |
| − | # <span style="color: rgb(51, 51, 51)">Fill up the necessary fields on the Header Part</span> | + | #<span style="color: rgb(51, 51, 51)">Fill up the necessary fields on the Header Part</span>[[File:Pro Expense Module (Create) - Step 03.png|center|950x950px]]<br /> |
| − | #* Take Note that the Vendor field is required for this transaction | + | #*Take Note that the Vendor field is required for this transaction |
| − | #* User can add a Vendor under Vendor field by clicking the Drop-down arrow then choose '''Add New Vendor''' | + | #*User can add a Vendor under Vendor field by clicking the Drop-down arrow then choose '''Add New Vendor'''[[File:Pro Expense Module (Add Vendor) - Step 01.png|center|600x600px]]<br /> |
| − | #** <span style="color: rgb(51, 51, 51)">Make sure to fill up the required fields in order to create new Vendor.</span> | + | #**<span style="color: rgb(51, 51, 51)">Make sure to fill up the required fields in order to create new Vendor.</span>[[File:Pro Purchase Module (Add Vendor) - Step 02.png|center|628x628px|link=https://docs.oojeema.com/File:Pro_Purchase_Module_(Add_Vendor)_-_Step_02.png]]<br /> |
| − | # <span style="color: rgb(51, 51, 51)">Fill up the Account Field</span> | + | #<span style="color: rgb(51, 51, 51)">Fill up the Account Field</span>[[File:Pro Expense Module (Create) - Step 04.png|link=https://docs.oojeema.com/File:Pro%20Expense%20Module%20(Create)%20-%20Step%2004.png|center|950x950px]] |
| − | # <span style="color: rgb(51, 51, 51)">Click Save</span> | + | #*User has an option to apply the withholding task by clicking the dropdown arrow on the Withholding tax field.[[File:Pro Expense Module (Withholding Tax) - Step 01.png|center|600x600px]]<br /> |
| − | #* User has an option on how the | + | #<span style="color: rgb(51, 51, 51)">Click Save</span>[[File:Pro Expense Module (Create) - Step 05.png|center|950x950px]]<br /> |
| − | #** Save - the system will save the | + | #*User has an option on how the Expense will be save. Below are the following options on saving an Invoice[[File:Pro Sales Invoice (Save Option) - Step 01.png|link=https://docs.oojeema.com/File:Pro%20Sales%20Invoice%20(Save%20Option)%20-%20Step%2001.png|center|114x114px]] |
| − | #** Save and New - the system will save the | + | #**Save - the system will save the Expense Transaction and will redirect the user to Expense Module Menu |
| − | #** Save and Preview - the system will save the | + | #**Save and New - the system will save the Expense Transaction and will redirect the user to Create Expense Menu |
| − | #** Save and Pay - the system will save the Expense Transaction and will redirect the user on Issue Payments Menu | + | #**Save and Preview - the system will save the Expense Transaction and will redirect the user on viewing the Expense Transaction. |
| + | #**Save and Pay - the system will save the Expense Transaction and will redirect the user on Issue Payments Menu | ||
======<span class="toctext ve-pasteProtect" style="box-sizing: inherit; font-family: "Open Sans", Roboto, arial, sans-serif; display: table-cell; padding-right: 1em;" data-ve-attributes="{"style":"box-sizing: inherit; font-family: \"Open Sans\", Roboto, arial, sans-serif; display: table-cell; padding-right: 1em;"}">Viewing Expense Transaction</span>====== | ======<span class="toctext ve-pasteProtect" style="box-sizing: inherit; font-family: "Open Sans", Roboto, arial, sans-serif; display: table-cell; padding-right: 1em;" data-ve-attributes="{"style":"box-sizing: inherit; font-family: \"Open Sans\", Roboto, arial, sans-serif; display: table-cell; padding-right: 1em;"}">Viewing Expense Transaction</span>====== | ||
| − | # Under Main Menu, Click <span>'''Expense'''</span> | + | #Under Main Menu, Click <span>'''Expense'''</span>[[File:Pro Expense Module (Create) - Step 01.png|link=https://docs.oojeema.com/File:Pro%20Expense%20Module%20(Create)%20-%20Step%2001.png|center|950x950px]] |
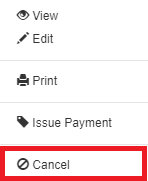
| − | # <span style="color: rgb(51, 51, 51)">Under | + | #<span style="color: rgb(51, 51, 51)">Under Expense Menu, Select a Expense Transaction that needs to view its Details, click the drop-down button then choose</span> '''View'''[[File:Pro Purchase Module (View) - Step 02.png|center|181x181px|link=https://docs.oojeema.com/File:Pro_Purchase_Module_(View)_-_Step_02.png]] |
| − | # <span style="color: rgb(51, 51, 51)">Under view | + | #<span style="color: rgb(51, 51, 51)">Under view Expense, the user has an option to Print, Issue Payment, Edit, Show its entries or Exit the Transaction</span>[[File:Pro Expense Module (View) - Step 03.png|center|950x950px]]<br /> |
| − | ====== <span class="mw-headline" id="Editing_Purchase_Transaction" style="box-sizing: inherit;">Editing Expense Transaction</span> ====== | + | ======<span class="mw-headline" id="Editing_Purchase_Transaction" style="box-sizing: inherit;">Editing Expense Transaction</span>====== |
| − | # Under Main Menu, Click <span>'''Expense'''</span> | + | #Under Main Menu, Click <span>'''Expense'''</span>[[File:Pro Expense Module (Create) - Step 01.png|link=https://docs.oojeema.com/File:Pro%20Expense%20Module%20(Create)%20-%20Step%2001.png|center|950x950px]] |
| − | # <span style="color: rgb(51, 51, 51)">Under Expense Menu, Select a Expense Transaction that needs to update its Details, click the drop-down button then choose</span> '''Edit''' | + | #<span style="color: rgb(51, 51, 51)">Under Expense Menu, Select a Expense Transaction that needs to update its Details, click the drop-down button then choose</span> '''Edit'''[[File:Pro Purchase Module (Edit) - Step 02.png|center|181x181px|link=https://docs.oojeema.com/File:Pro_Purchase_Module_(Edit)_-_Step_02.png]]<br /> |
| − | # <span style="color: rgb(51, 51, 51)">Update the necessary fields</span> | + | #<span style="color: rgb(51, 51, 51)">Update the necessary fields</span>[[File:Pro Expense Module (Edit) - Step 03.png|center|950x950px]]<br /> |
| − | # Click Save | + | #Click Save[[File:Pro Sales Invoice (Save Option) - Step 01.png|link=https://docs.oojeema.com/File:Pro%20Sales%20Invoice%20(Save%20Option)%20-%20Step%2001.png|center|114x114px]] |
| − | #* User has an option on how the Invoice will be save. Below are the following options on saving an Invoice | + | #*User has an option on how the Invoice will be save. Below are the following options on saving an Invoice |
| − | #** Save - the system will save the Purchase Transaction and will redirect the user to Expense Module Menu | + | #**Save - the system will save the Purchase Transaction and will redirect the user to Expense Module Menu |
| − | #** Save and New - the system will save the Purchase Transaction and will redirect the user to Create Expense Menu | + | #**Save and New - the system will save the Purchase Transaction and will redirect the user to Create Expense Menu |
| − | #** Save and Preview - the system will save the Purchase Transaction and will redirect the user on viewing the Expense Transaction. | + | #**Save and Preview - the system will save the Purchase Transaction and will redirect the user on viewing the Expense Transaction. |
| − | #** Save and Pay - the system will save the Expense Transaction and will redirect the user on Issue Payments Menu | + | #**Save and Pay - the system will save the Expense Transaction and will redirect the user on Issue Payments Menu |
| − | ====== <span class="mw-headline" id="Printing_Purchase_Transaction" style="box-sizing: inherit;">Printing Expense Transaction</span> ====== | + | ======<span class="mw-headline" id="Printing_Purchase_Transaction" style="box-sizing: inherit;">Printing Expense Transaction</span>====== |
| − | # Under Main Menu, Click <span>'''Expense'''</span> | + | #Under Main Menu, Click <span>'''Expense'''</span>[[File:Pro Expense Module (Create) - Step 01.png|link=https://docs.oojeema.com/File:Pro%20Expense%20Module%20(Create)%20-%20Step%2001.png|center|950x950px]] |
| − | # <span class="ve-pasteProtect" style="color: rgb(51, 51, 51)" data-ve-attributes="{"style":"color: rgb(51, 51, 51)"}">Under Expense Menu, Select a Expense Transaction that needs to print its Details, click the drop-down button then choose</span> '''Print'''<br /> | + | #<span class="ve-pasteProtect" style="color: rgb(51, 51, 51)" data-ve-attributes="{"style":"color: rgb(51, 51, 51)"}">Under Expense Menu, Select a Expense Transaction that needs to print its Details, click the drop-down button then choose</span> '''Print'''[[File:Pro Purchase Module (Print) - Step 02.png|center|181x181px|link=https://docs.oojeema.com/File:Pro_Purchase_Module_(Print)_-_Step_02.png]]<br /> |
| − | ====== <span class="mw-headline" id="Issuing_Payment_on_Purchase_Transaction" style="box-sizing: inherit;">Issuing Payment on Expense Transaction</span> ====== | + | ======<span class="mw-headline" id="Issuing_Payment_on_Purchase_Transaction" style="box-sizing: inherit;">Issuing Payment on Expense Transaction</span>====== |
| − | # Under Main Menu, Click <span>'''Expense'''</span> | + | #Under Main Menu, Click <span>'''Expense'''</span>[[File:Pro Expense Module (Create) - Step 01.png|link=https://docs.oojeema.com/File:Pro%20Expense%20Module%20(Create)%20-%20Step%2001.png|center|950x950px]] |
| − | # <span style="color: rgb(51, 51, 51)">Under Expense Menu, Select a Expense Transaction that needs to issue its payments, click the drop-down button then choose</span> '''Issue Payment''' | + | #<span style="color: rgb(51, 51, 51)">Under Expense Menu, Select a Expense Transaction that needs to issue its payments, click the drop-down button then choose</span> '''Issue Payment'''[[File:Pro Purchase Module (Issue Payment) - Step 02.png|center|181x181px|link=https://docs.oojeema.com/File:Pro_Purchase_Module_(Issue_Payment)_-_Step_02.png]] |
| − | # <span style="color: rgb(51, 51, 51)">Under Issue Payment Menu, fill up the necessary fields and click Save</span> | + | #<span style="color: rgb(51, 51, 51)">Under Issue Payment Menu, fill up the necessary fields and click Save</span>[[File:Pro Expense Module (Issue Payment) - Step 03.png|center|950x950px]]<br /> |
| − | ====== <span class="mw-headline" id="Cancelling_Purchase_Transaction" style="box-sizing: inherit;">Cancelling Expense Transaction</span> ====== | + | ======<span class="mw-headline" id="Cancelling_Purchase_Transaction" style="box-sizing: inherit;">Cancelling Expense Transaction</span>====== |
| − | # <span style="color: rgb(51, 51, 51)">Under Main Menu, Click <span>'''Expense'''</span></span> | + | #<span style="color: rgb(51, 51, 51)">Under Main Menu, Click <span>'''Expense'''</span></span>[[File:Pro Expense Module (Create) - Step 01.png|link=https://docs.oojeema.com/File:Pro%20Expense%20Module%20(Create)%20-%20Step%2001.png|center|950x950px]] |
| − | # <span style="color: rgb(51, 51, 51)">Under Expense Menu, Select a Expense Transaction that needs to cancel, click the drop-down button then choose</span> '''Cancel''' | + | #<span style="color: rgb(51, 51, 51)">Under Expense Menu, Select a Expense Transaction that needs to cancel, click the drop-down button then choose</span> '''Cancel'''[[File:Pro Purchase Module (Cancel) - Step 02.png|center|181x181px|link=https://docs.oojeema.com/File:Pro_Purchase_Module_(Cancel)_-_Step_02.png]] |
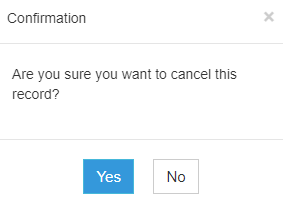
| − | # <span style="color: rgb(51, 51, 51)">Click Yes to proceed in cancelling the Expense Transaction</span> | + | #<span style="color: rgb(51, 51, 51)">Click Yes to proceed in cancelling the Expense Transaction</span>[[File:Pro Sales Invoice (Cancel) - Step 03.png|link=https://docs.oojeema.com/File:Pro%20Sales%20Invoice%20(Cancel)%20-%20Step%2003.png|center|283x283px]] |
| − | ===== <span class="mw-headline" id="Managing_Imports_and_Exports_of_Purchase" style="box-sizing: inherit;">Managing Imports and Exports of Expense</span> ===== | + | =====<span class="mw-headline" id="Managing_Imports_and_Exports_of_Purchase" style="box-sizing: inherit;">Managing Imports and Exports of Expense</span>===== |
| − | ====== <span class="mw-headline" id="Exporting_Purchases" style="box-sizing: inherit;">Exporting | + | ======<span class="mw-headline" id="Exporting_Purchases" style="box-sizing: inherit;">Exporting Expense</span>====== |
| − | # <span class="ve-pasteProtect" style="color: rgb(51, 51, 51)" data-ve-attributes="{"style":"color: rgb(51, 51, 51)"}">Under Main Menu, Click <span>'''Expense'''</span></span> | + | #<span class="ve-pasteProtect" style="color: rgb(51, 51, 51)" data-ve-attributes="{"style":"color: rgb(51, 51, 51)"}">Under Main Menu, Click <span>'''Expense'''</span></span>[[File:Pro Expense Module (Create) - Step 01.png|link=https://docs.oojeema.com/File:Pro%20Expense%20Module%20(Create)%20-%20Step%2001.png|center|950x950px]] |
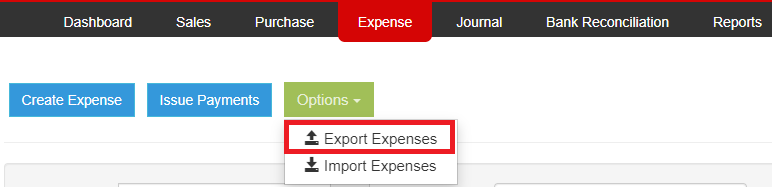
| − | # <span style="color: rgb(51, 51, 51)">Under Expense Menu, Click Options then choose</span> '''Export Purchase''' | + | #<span style="color: rgb(51, 51, 51)">Under Expense Menu, Click Options then choose</span> '''Export Purchase'''[[File:Pro Expense Module (Export) - Step 02.png|center|772x772px]]<br /> |
| − | #* <span style="color: rgb(51, 51, 51)">Take note that the user has an option to use the record filters for precise exporting of records</span> | + | #*<span style="color: rgb(51, 51, 51)">Take note that the user has an option to use the record filters for precise exporting of records</span>[[File:Pro Expense Module (Export - Step 02.1.png|center|600x600px]]<br /> |
| − | ====== <span class="mw-headline" id="Importing_Purchases" style="box-sizing: inherit;">Importing | + | ======<span class="mw-headline" id="Importing_Purchases" style="box-sizing: inherit;">Importing Expense</span>====== |
| − | # <span style="color: rgb(51, 51, 51)">Under Main Menu, Click <span>'''Expense'''</span></span> | + | #<span style="color: rgb(51, 51, 51)">Under Main Menu, Click <span>'''Expense'''</span></span>[[File:Pro Expense Module (Create) - Step 01.png|link=https://docs.oojeema.com/File:Pro%20Expense%20Module%20(Create)%20-%20Step%2001.png|center|950x950px]] |
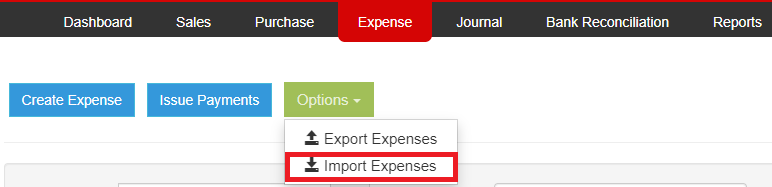
| − | # <span style="color: rgb(51, 51, 51)">Under Expense Menu, Click Options then choose</span> '''Import Purchase''' | + | #<span style="color: rgb(51, 51, 51)">Under Expense Menu, Click Options then choose</span> '''Import Purchase'''[[File:Pro Expense Module (Import) - Step 02.png|772x772px]] |
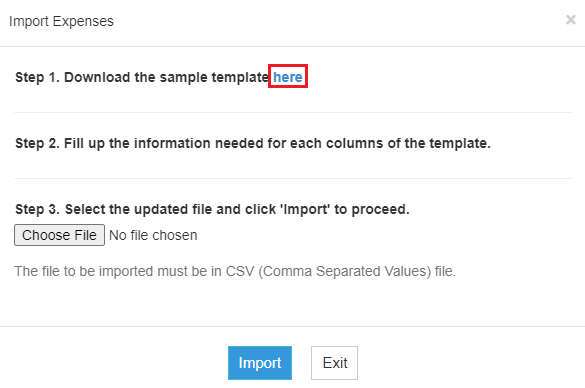
| − | # <span style="color: rgb(51, 51, 51)">Download the Template in the Link provided</span> | + | #<span style="color: rgb(51, 51, 51)">Download the Template in the Link provided</span>[[File:Pro Expense Module (Import) - Step 03.png|center|585x585px]]<br /> |
| − | # <span style="color: rgb(51, 51, 51)">Fill out the Template</span> | + | #<span style="color: rgb(51, 51, 51)">Fill out the Template</span>[[File:Pro Expense Module (Import) - Step 04.png|center|950x950px]]<br /> |
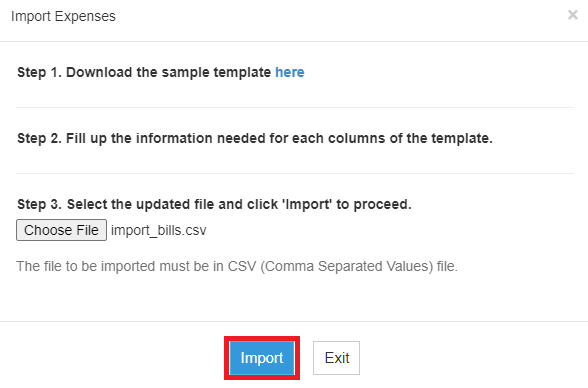
| − | # <span style="color: rgb(51, 51, 51)">Attach the Template then Click</span> '''Import.'''<br /> | + | #<span style="color: rgb(51, 51, 51)">Attach the Template then Click</span> '''Import.'''[[File:Pro Expense Module (Import) - Step 05.png|center|588x588px]]<br /> |
| − | ===== <span class="mw-headline" id="Issuing_Payments_on_Purchase_Module" style="box-sizing: inherit;">Issuing Payments on Expense Module</span> ===== | + | =====<span class="mw-headline" id="Issuing_Payments_on_Purchase_Module" style="box-sizing: inherit;">Issuing Payments on Expense Module</span>===== |
| − | # <span class="ve-pasteProtect" style="color: rgb(51, 51, 51)" data-ve-attributes="{"style":"color: rgb(51, 51, 51)"}">Under Main Menu, Click <span>'''Expense'''</span></span> | + | #<span class="ve-pasteProtect" style="color: rgb(51, 51, 51)" data-ve-attributes="{"style":"color: rgb(51, 51, 51)"}">Under Main Menu, Click <span>'''Expense'''</span></span>[[File:Pro Expense Module (Create) - Step 01.png|link=https://docs.oojeema.com/File:Pro%20Expense%20Module%20(Create)%20-%20Step%2001.png|center|950x950px]] |
| − | # <span class="ve-pasteProtect" style="color: rgb(51, 51, 51)" data-ve-attributes="{"style":"color: rgb(51, 51, 51)"}">Under Expense Menu, Click '''Issue Payments'''</span> | + | #<span class="ve-pasteProtect" style="color: rgb(51, 51, 51)" data-ve-attributes="{"style":"color: rgb(51, 51, 51)"}">Under Expense Menu, Click '''Issue Payments'''</span>[[File:Pro Expense Module (Issuing Payments) - Step 01.png|center|767x767px]]<br /> |
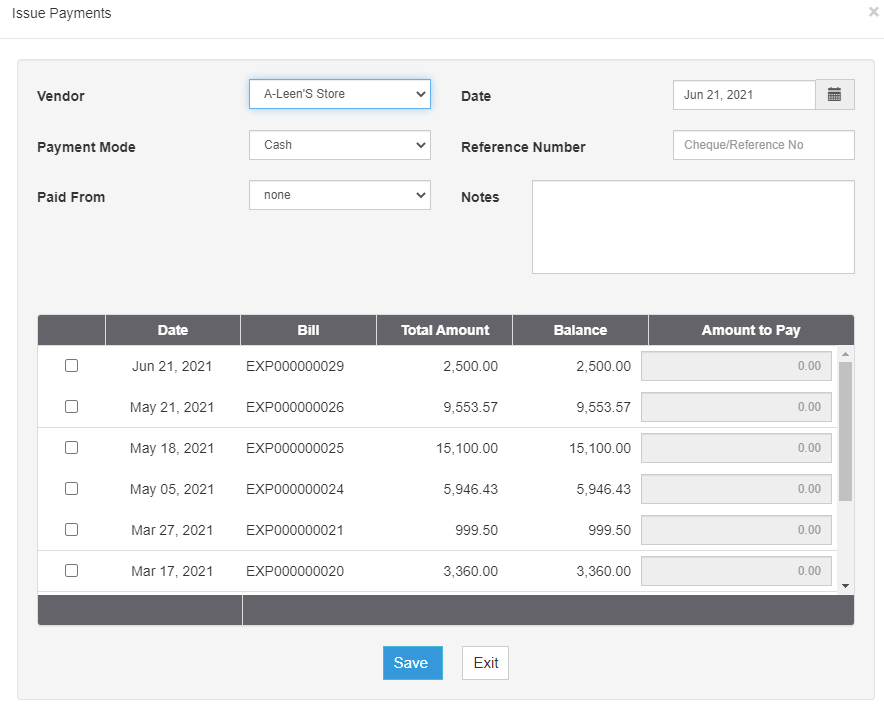
| − | # <span style="color: rgb(51, 51, 51)">Fill up the necessary fields and choose the Expense Transactions that needs to be paid</span> | + | #<span style="color: rgb(51, 51, 51)">Fill up the necessary fields and choose the Expense Transactions that needs to be paid</span>[[File:Pro Expense Module (Issuing Payments) - Step 03.png|center|884x884px]]<br /> |
| − | # Click Save | + | #Click Save |
Revision as of 14:20, 21 June 2021
Contents
Expense Job Aids
Managing Expense Transaction
Creating Expense Transaction
- Under Main Menu, Click Expense

- Under Expense Menu, Click Create New Expense

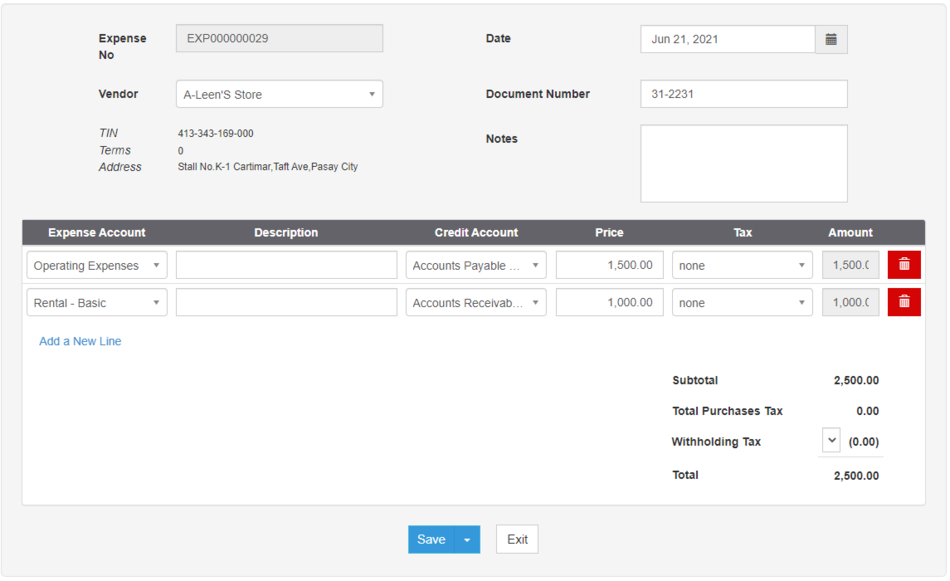
- Fill up the necessary fields on the Header Part
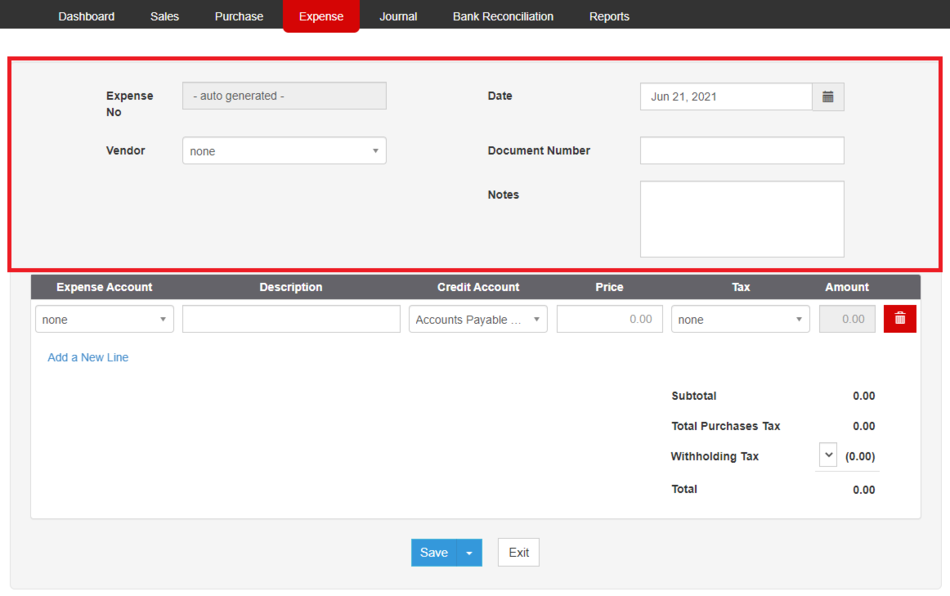
- Take Note that the Vendor field is required for this transaction
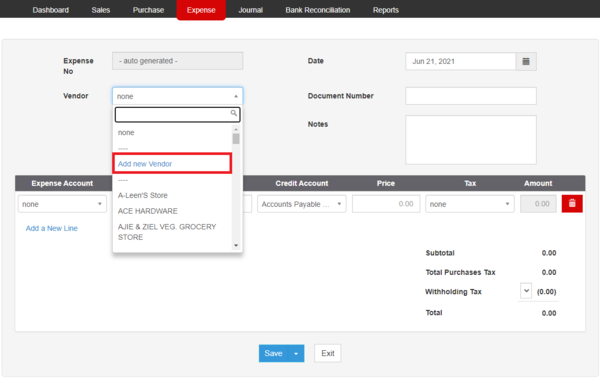
- User can add a Vendor under Vendor field by clicking the Drop-down arrow then choose Add New Vendor
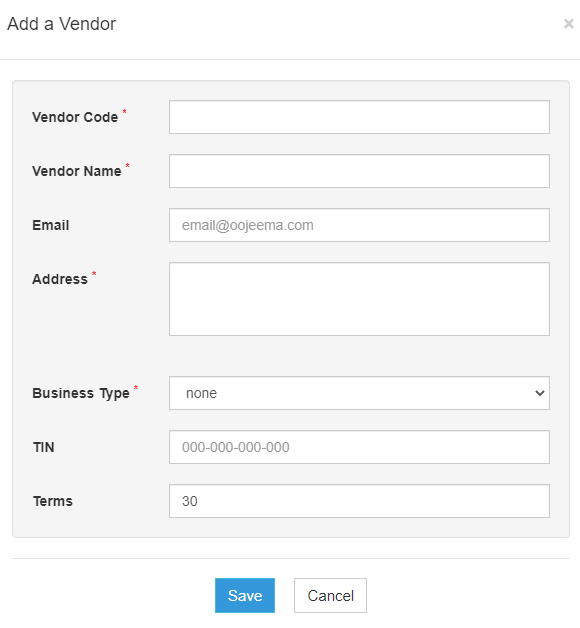
- Make sure to fill up the required fields in order to create new Vendor.
- Make sure to fill up the required fields in order to create new Vendor.
- Fill up the Account Field

- User has an option to apply the withholding task by clicking the dropdown arrow on the Withholding tax field.
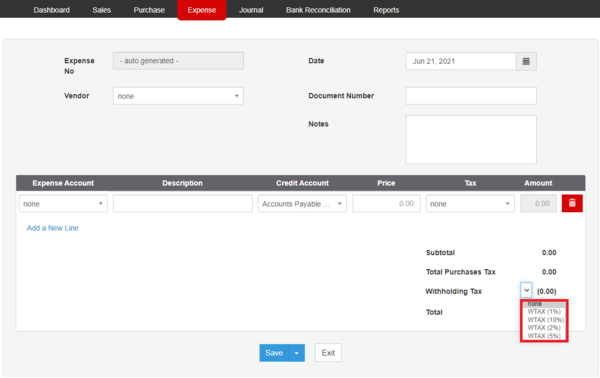
- User has an option to apply the withholding task by clicking the dropdown arrow on the Withholding tax field.
- Click Save
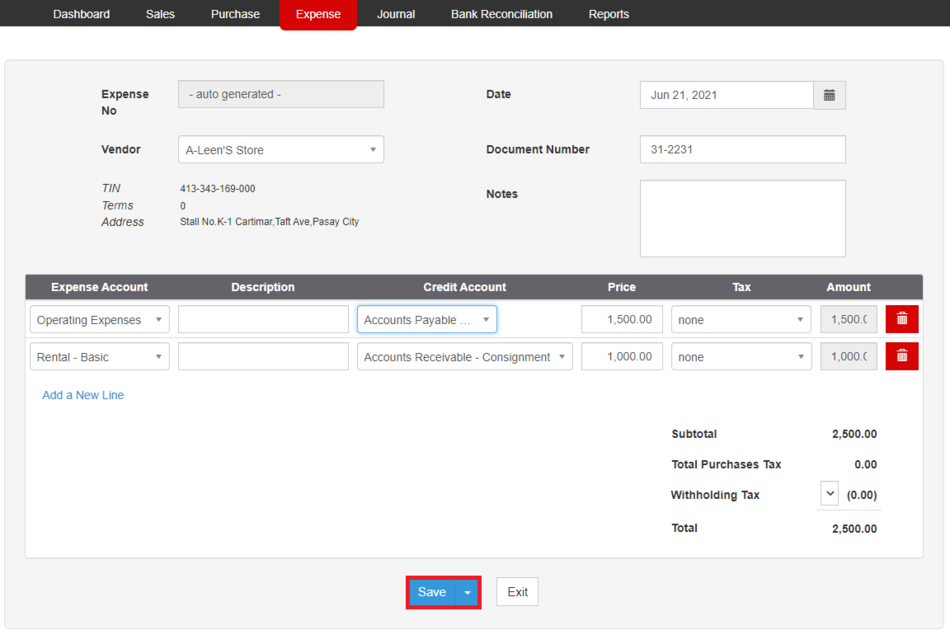
- User has an option on how the Expense will be save. Below are the following options on saving an Invoice

- Save - the system will save the Expense Transaction and will redirect the user to Expense Module Menu
- Save and New - the system will save the Expense Transaction and will redirect the user to Create Expense Menu
- Save and Preview - the system will save the Expense Transaction and will redirect the user on viewing the Expense Transaction.
- Save and Pay - the system will save the Expense Transaction and will redirect the user on Issue Payments Menu
- User has an option on how the Expense will be save. Below are the following options on saving an Invoice
_-_Step_01.png)
_-_Step_02.png)
_-_Step_03.png)
_-_Step_01.png)
_-_Step_02.png)
%20-%20Step%2004.png)
_-_Step_01.png)
_-_Step_05.png)
%20-%20Step%2001.png)
Viewing Expense Transaction
- Under Main Menu, Click Expense
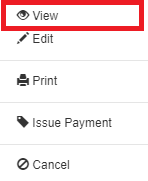
- Under Expense Menu, Select a Expense Transaction that needs to view its Details, click the drop-down button then choose View
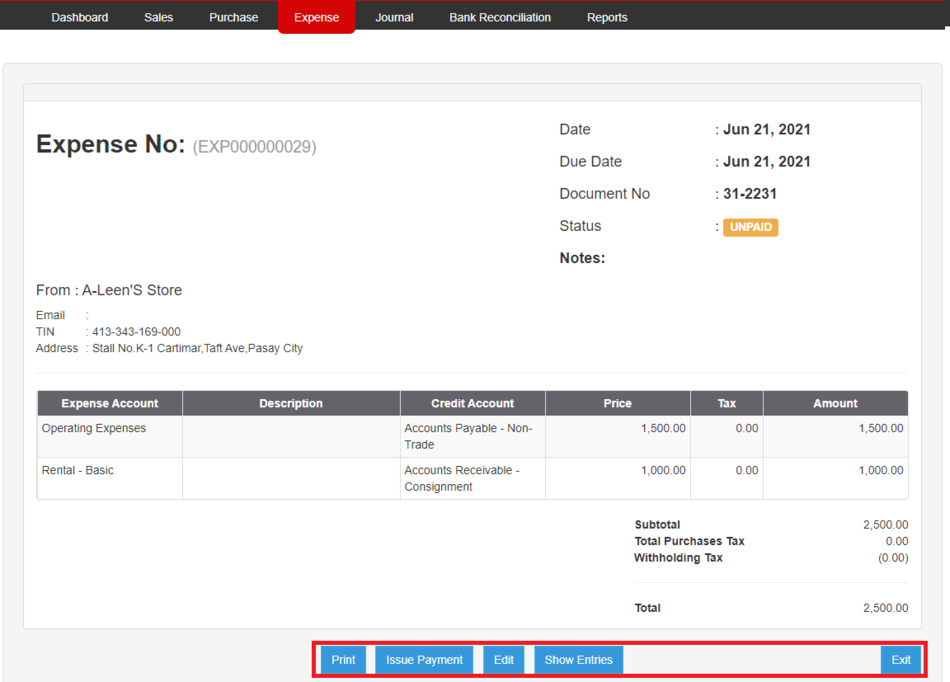
- Under view Expense, the user has an option to Print, Issue Payment, Edit, Show its entries or Exit the Transaction
%20-%20Step%2001.png)
_-_Step_02.png)
_-_Step_03.png)
Editing Expense Transaction
- Under Main Menu, Click Expense
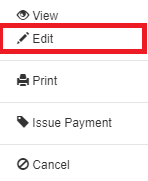
- Under Expense Menu, Select a Expense Transaction that needs to update its Details, click the drop-down button then choose Edit
- Update the necessary fields
- Click Save
- User has an option on how the Invoice will be save. Below are the following options on saving an Invoice
- Save - the system will save the Purchase Transaction and will redirect the user to Expense Module Menu
- Save and New - the system will save the Purchase Transaction and will redirect the user to Create Expense Menu
- Save and Preview - the system will save the Purchase Transaction and will redirect the user on viewing the Expense Transaction.
- Save and Pay - the system will save the Expense Transaction and will redirect the user on Issue Payments Menu
- User has an option on how the Invoice will be save. Below are the following options on saving an Invoice
_-_Step_02.png)
_-_Step_03.png)
Printing Expense Transaction
- Under Main Menu, Click Expense
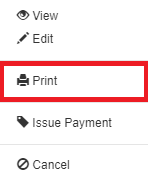
- Under Expense Menu, Select a Expense Transaction that needs to print its Details, click the drop-down button then choose Print
_-_Step_02.png)
Issuing Payment on Expense Transaction
- Under Main Menu, Click Expense
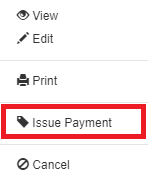
- Under Expense Menu, Select a Expense Transaction that needs to issue its payments, click the drop-down button then choose Issue Payment
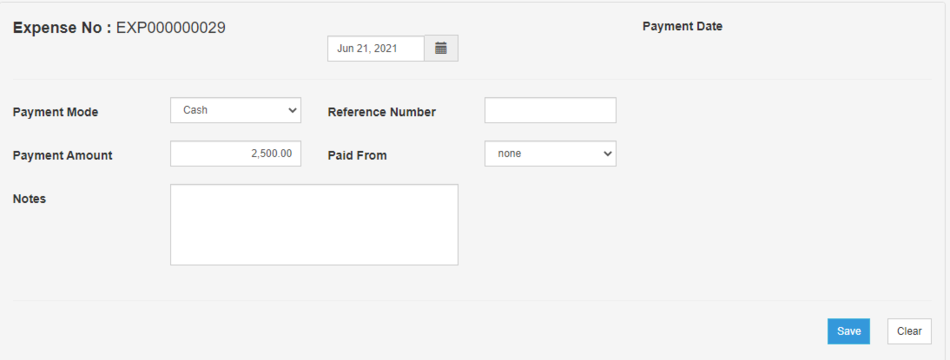
- Under Issue Payment Menu, fill up the necessary fields and click Save
_-_Step_02.png)
_-_Step_03.png)
Cancelling Expense Transaction
- Under Main Menu, Click Expense
- Under Expense Menu, Select a Expense Transaction that needs to cancel, click the drop-down button then choose Cancel
- Click Yes to proceed in cancelling the Expense Transaction
_-_Step_02.png)
%20-%20Step%2003.png)
Managing Imports and Exports of Expense
Exporting Expense
- Under Main Menu, Click Expense
- Under Expense Menu, Click Options then choose Export Purchase
- Take note that the user has an option to use the record filters for precise exporting of records
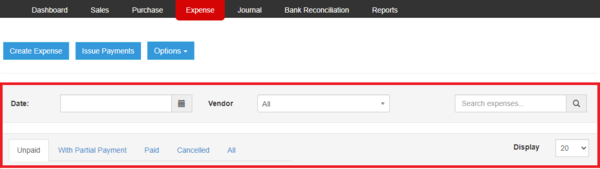
- Take note that the user has an option to use the record filters for precise exporting of records
_-_Step_02.png)

Importing Expense
- Under Main Menu, Click Expense
- Under Expense Menu, Click Options then choose Import Purchase
- Download the Template in the Link provided
- Fill out the Template

- Attach the Template then Click Import.
_-_Step_02.png)
_-_Step_03.png)
_-_Step_04.png)
_-_Step_05.png)
Issuing Payments on Expense Module
- Under Main Menu, Click Expense
- Under Expense Menu, Click Issue Payments

- Fill up the necessary fields and choose the Expense Transactions that needs to be paid
- Click Save
_-_Step_01.png)
_-_Step_03.png)