You are viewing an old version of this page. Return to the latest version.
Difference between revisions of "Oojeema Pro Users Job Aids"
(Tag: Visual edit) |
(Tag: 2017 source edit) |
||
| Line 1: | Line 1: | ||
| + | {{DISPLAYTITLE:Users Job Aids}}<div style="text-align: center;"> | ||
| + | [[Pro Users|Users]] | [[Pro Users Group Access|Users Group Access]] | ||
| + | </div> | ||
| + | |||
| + | <br /> | ||
==Users Job Aids== | ==Users Job Aids== | ||
| + | Notes: | ||
| + | |||
| + | *The user must have the following Modules in order to use Users Module | ||
| + | **[[Pro Users Group Access|Users Group Access]] | ||
=====<span class="mw-headline ve-pasteProtect" id="Managing_Items" style="box-sizing: inherit;" data-ve-attributes="{"style":"box-sizing: inherit;"}"><span class="mw-headline ve-pasteProtect" id="Managing_Customer" data-ve-attributes="{"style":"box-sizing: inherit;"}" style="box-sizing: inherit;">Managing Users</span></span>===== | =====<span class="mw-headline ve-pasteProtect" id="Managing_Items" style="box-sizing: inherit;" data-ve-attributes="{"style":"box-sizing: inherit;"}"><span class="mw-headline ve-pasteProtect" id="Managing_Customer" data-ve-attributes="{"style":"box-sizing: inherit;"}" style="box-sizing: inherit;">Managing Users</span></span>===== | ||
Revision as of 14:38, 3 August 2021
Contents
Users Job Aids
Notes:
- The user must have the following Modules in order to use Users Module
Managing Users
Inviting a User
- On the Main Menu, click the Gear Icon then choose Maintenance
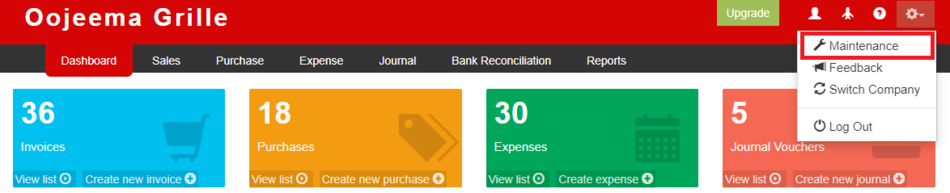
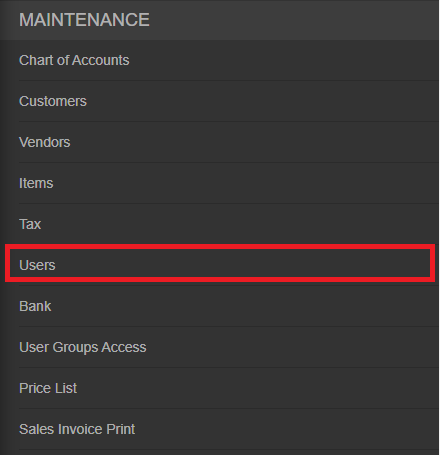
- Under Maintenance Side Bar, Click Users
- Under Users Menu, Click Options then choose Invite a User

- Fill up the necessary fields and Click Send
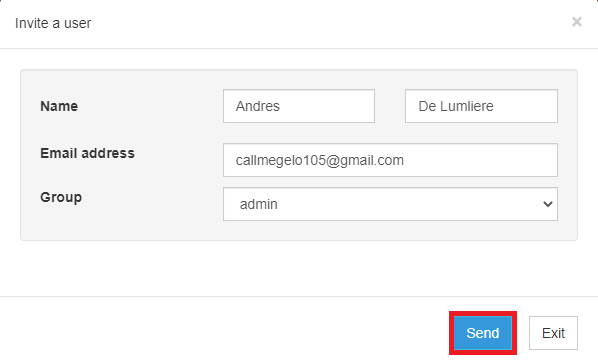
- The system will provide the credentials via email. Click on the link provided in order for the new user to log in.

%20-%20Step%2001.png)
_-_Step_02.png)
_-_Step_03.png)
_-_Step_04.png)
_-_Step_05.png)
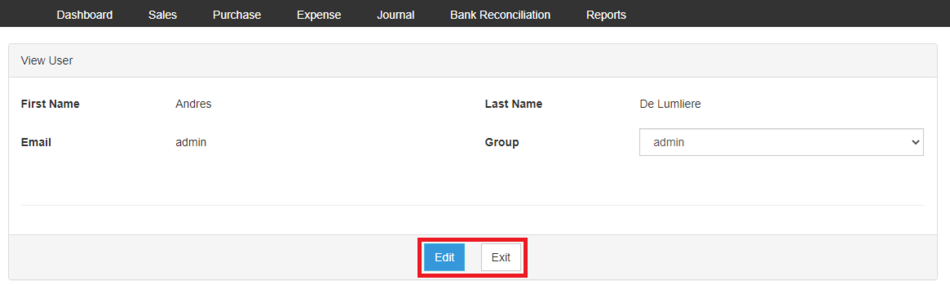
Viewing Users
- On the Main Menu, click the Gear Icon then choose Maintenance
- Under Maintenance Side Bar, Click Users
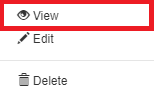
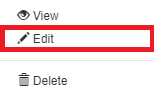
- Under Users Menu, Select the Users that needs to view its details, click the drop down arrow then choose View
- The user has an option to Edit the Users details or to Exit the View Record.
%20-%20Step%2002.png)
%20-%20Step%2003.png)
_-_Step_04.png)
Editing Users
- On the Main Menu, click the Gear Icon then choose Maintenance
- Under Maintenance Side Bar, Click Users
- Under Users Menu, Select the Users that needs to update its details, click the drop down arrow then choose Edit
- Update the necessary fields
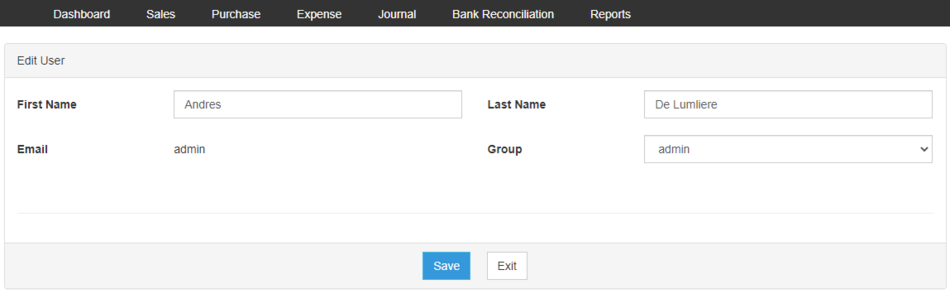
- Click Save
%20-%20Step%2003.png)
_-_Step_04.png)
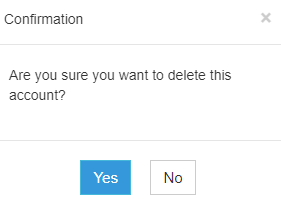
Deleting Users
- On the Main Menu, click the Gear Icon then choose Maintenance
- Under Maintenance Side Bar, Click Users
- Under Users Menu, Select the Users that needs to be deleted, click the drop down arrow then choose Delete
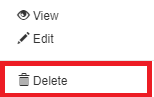
- Click Yes to Confirm the deletion process
%20-%20Step%2003.png)
%20-%20Step%2004.png)