No categories assigned
Issuing Payment for Purchases
-
- Last edited 5 years ago by John Ruel Montesino
-
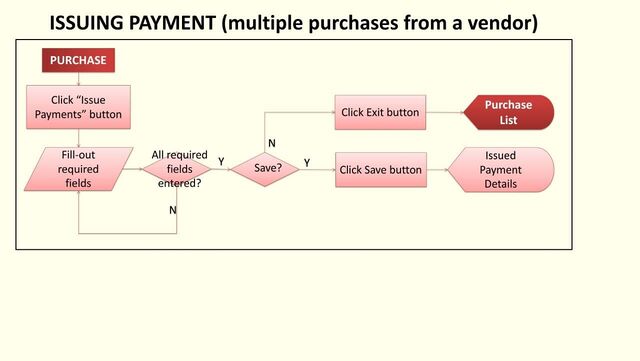
Issuing Payment for Multiple Purchases from a Vendor
To issue payment for multiple purchases from a vendor:
- On the menu bar, click on “Purchase”. The Purchase list will be displayed.
- Click on “Issue Payments” button. Issue Payments pop-up form will be displayed.
- Fill out the form:
- Vendor – list of vendors with unpaid purchases will be displayed for selection
- Date - for Payment Voucher transaction date selection (displays current date by default)
- Payment Mode – for selection of payment mode
- Cash – enter “Reference Number” (if any)
- Cheque – requires entry of “Cheque Number” and “Cheque Date”
- Paid From – list of banks or cash accounts for selection, to where to withdraw or deduct the payment
- Notes - for entry of remarks / notes for the Payment Voucher
- List of purchases from selected vendor:
- Tick corresponding purchase’s checkbox to issue payment
- Enter amount to pay (displays purchase’s Balance by default)
- After filling-out the form, click “Save” button. The issued payment details will be saved on the corresponding purchase’s view page.
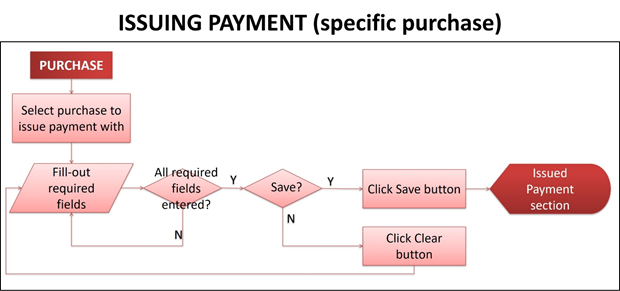
Issuing Payment for a Specific Purchase
To issue payment for a specific purchase from a vendor:
- On the menu bar, click on “Purchase”. The Purchase list will be displayed.
- On the Purchase list, click on the dropdown icon to the left of the purchase you want to issue payment with, then select “Issue Payment”. Or view the purchase you want to issue payment with, then click “Issue Payment” button.
- Payment Voucher form will be displayed. Fill out the form:
- Payment Date - for Payment Voucher transaction date selection (displays current date by default)
- Payment Mode – for selection of payment mode
- Cash – enter “Reference Number” (if any)
- Cheque – requires entry of “Cheque Number” and “Check Date”
- Payment Amount – for entry of amount to pay (displays remaining balance to vendor by default)
- Paid From – list of banks or cash accounts for selection, to where to withdraw or deduct the payment
- Notes - for entry of remarks / notes for the Payment Voucher
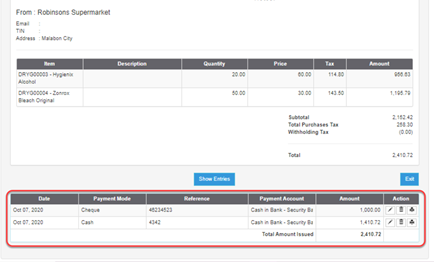
- After filling-out the form, click “Save” button. The payment details will be displayed on the “Issued Payments” section at the bottom of “View Purchase” page. Otherwise, click “Clear” to reset the Payment Voucher details to default.
Managing Issued Payments
Issued payments per Purchase can be viewed, edited, deleted or print Payment Voucher thru the “Issued Payments” section at the bottom of each purchase’s view page.


