You are viewing an old version of this page. Return to the latest version.
Version of 11:13, 18 June 2021 by Gelo
Difference between revisions of "Oojeema Pro Purchase Job Aids"
(Created page with "== Purchase Module Job Aids == ===== Managing Purchase No. ===== ====== Creating Purchase Transaction ====== # Under Main Menu, Click '''Purchase''' # Under Purchase Menu,...") (Tag: Visual edit) |
(Tag: Visual edit) |
||
| (3 intermediate revisions by the same user not shown) | |||
| Line 1: | Line 1: | ||
| − | == Purchase Module Job Aids == | + | <div style="text-align: center;"> |
| + | [[Pro Purchase|Purchase]] | [[Pro Purchase Order|Purchase Order]] | [[Pro Issue Payment|Issue Payment]] | [[Oojeema Pro Purchase Job Aids|Purchase Job Aids]] | ||
| + | </div><br /> | ||
| + | ==Purchase Module Job Aids== | ||
| − | ===== Managing Purchase No. ===== | + | =====Managing Purchase No.===== |
| − | ====== Creating Purchase Transaction ====== | + | ======Creating Purchase Transaction====== |
| − | # Under Main Menu, Click '''Purchase''' | + | #Under Main Menu, Click '''[[Pro Purchase|Purchase]]'''[[File:Pro Purchase Module (Create) - Step 01.png|center|950x950px]]<br /> |
| − | # Under Purchase Menu, Click '''Create New Purchase''' | + | #Under Purchase Menu, Click '''Create New Purchase'''[[File:Pro Purchase Module (Create) - Step 02.png|center|770x770px]]<br /> |
| − | # <span style="color: rgb(51, 51, 51)">Fill up the necessary fields on the Header Part</span> | + | #<span style="color: rgb(51, 51, 51)">Fill up the necessary fields on the Header Part</span>[[File:Pro Purchase Module (Create) - Step 03.png|center|950x950px]]<br /> |
| − | #* Take Note that the Vendor field is required for this transaction | + | #*Take Note that the [[Pro Vendors|Vendor]] field is required for this transaction |
| − | #* User can add a Vendor under Vendor field by clicking the Drop-down arrow then choose '''Add New Vendor''' | + | #*User can add a Vendor under Vendor field by clicking the Drop-down arrow then choose '''Add New Vendor'''[[File:Pro Purchase Module (Add Vendor) - Step 01.png|center|600x600px]]<br /> |
| − | # <span style="color: rgb(51, 51, 51)">Fill up the Item Field</span> | + | #**Make sure to fill up the required fields in order to create new Vendor.[[File:Pro Purchase Module (Add Vendor) - Step 02.png|center|628x628px]]<br /> |
| − | #* <span style="color: rgb(51, 51, 51)">Make sure to fill up the required fields in order to create an Item record</span> | + | #<span style="color: rgb(51, 51, 51)">Fill up the Item Field</span>[[File:Pro Purchase Module (Create) - Step 04.png|center|950x950px]]<br /> |
| − | #** Take Note that it requires at least one item in order for the transaction to proceed | + | #*<span style="color: rgb(51, 51, 51)">Make sure to fill up the required fields in order to create an [[Pro Purchase|Item]] record</span> |
| − | #** User can add an Item under Item field by clicking the Drop-down arrow then choose Add New Item | + | #**Take Note that it requires at least one item in order for the transaction to proceed |
| − | #* User has an option to apply the withholding task by clicking the dropdown arrow on the Withholding tax field. | + | #**User can add an Item under Item field by clicking the Drop-down arrow then choose Add New Item[[File:Pro Purchase Module (Add Item) - Step 01.png|link=https://docs.oojeema.com/File:Pro%20Purchase%20Module%20(Add%20Item)%20-%20Step%2001.png|center|600x600px]] |
| − | # Click Save | + | #**Make sure to fill up the required fields in order to create an Item record[[File:Pro Sales Invoice (Create Item) - Step 02.png|link=https://docs.oojeema.com/File:Pro%20Sales%20Invoice%20(Create%20Item)%20-%20Step%2002.png|center|786x786px]]<br /> |
| − | #* User has an option on how the Invoice will be save. Below are the following options on saving an Invoice<br /> | + | #*User has an option to apply the withholding task by clicking the dropdown arrow on the Withholding tax field.[[File:Pro Purchase Module (Withholding Tax) - Step 01.png|center|600x600px]]<br /> |
| − | #** Save - the system will save the Purchase Transaction and will redirect the user to Purchase Module Menu | + | #Click Save[[File:Pro Purchase Module (Create) - Step 05.png|center|950x950px]]<br /> |
| − | #** Save and New - the system will save the Purchase Transaction and will redirect the user to Create Purchase Menu | + | #*User has an option on how the Invoice will be save. Below are the following options on saving an Invoice<br />[[File:Pro Sales Invoice (Save Option) - Step 01.png|link=https://docs.oojeema.com/File:Pro%20Sales%20Invoice%20(Save%20Option)%20-%20Step%2001.png|center|114x114px]] |
| − | #** Save and Preview - the system will save the Purchase Transaction and will redirect the user on viewing the Purchase Transaction. | + | #**Save - the system will save the Purchase Transaction and will redirect the user to Purchase Module Menu |
| − | #** Save and Pay - the system will save the Purchase Transaction and will redirect the user on Issue Payments Menu | + | #**Save and New - the system will save the Purchase Transaction and will redirect the user to Create Purchase Menu |
| + | #**Save and Preview - the system will save the Purchase Transaction and will redirect the user on viewing the Purchase Transaction. | ||
| + | #**Save and Pay - the system will save the Purchase Transaction and will redirect the user on Issue Payments Menu | ||
| − | ====== Viewing Purchase Transaction ====== | + | ======Viewing Purchase Transaction====== |
| − | # Under Main Menu, ''' | + | #Under Main Menu, Click '''[[Pro Purchase|Purchase]]'''[[File:Pro Purchase Module (Create) - Step 01.png|link=https://docs.oojeema.com/File:Pro%20Purchase%20Module%20(Create)%20-%20Step%2001.png|center|950x950px]] |
| − | # <span style="color: rgb(51, 51, 51)">Under Purchase Menu, Select a Purchase Transaction that needs to view its Details, click the drop-down button then choose</span> '''View''' | + | #<span style="color: rgb(51, 51, 51)">Under Purchase Menu, Select a Purchase Transaction that needs to view its Details, click the drop-down button then choose</span> '''View'''[[File:Pro Purchase Module (View) - Step 02.png|center|181x181px]]<br /> |
| − | # <span style="color: rgb(51, 51, 51)">Under view Purchase, the user has an option to Issue Payment, Edit, Show its entries or Exit the Transaction</span> | + | #<span style="color: rgb(51, 51, 51)">Under view Purchase, the user has an option to Issue Payment, Edit, Show its entries or Exit the Transaction</span>[[File:Pro Purchase Module (Edit) - Step 03.png|center|950x950px]]<br /> |
| − | ====== Editing Purchase Transaction ====== | + | ======Editing Purchase Transaction====== |
| − | # Under Main Menu, ''' | + | #Under Main Menu, Click '''[[Pro Purchase|Purchase]]'''[[File:Pro Purchase Module (Create) - Step 01.png|link=https://docs.oojeema.com/File:Pro%20Purchase%20Module%20(Create)%20-%20Step%2001.png|center|950x950px]] |
| − | # <span style="color: rgb(51, 51, 51)">Under Purchase Menu, Select a Purchase Transaction that needs to update its Details, click the drop-down button then choose</span> '''Edit''' | + | #<span style="color: rgb(51, 51, 51)">Under Purchase Menu, Select a Purchase Transaction that needs to update its Details, click the drop-down button then choose</span> '''Edit'''[[File:Pro Purchase Module (Edit) - Step 02.png|center|181x181px]]<br /> |
| − | # <span style="color: rgb(51, 51, 51)">Update the necessary fields</span> | + | #<span style="color: rgb(51, 51, 51)">Update the necessary fields</span>[[File:Pro Purchase Module (Edit) - Step 03.png|center|thumb|950x950px]]<br /> |
| − | # Click Save | + | #Click Save |
| − | #* User has an option on how the Invoice will be save. Below are the following options on saving an Invoice | + | #*User has an option on how the Invoice will be save. Below are the following options on saving an Invoice[[File:Pro Sales Invoice (Save Option) - Step 01.png|link=https://docs.oojeema.com/File:Pro%20Sales%20Invoice%20(Save%20Option)%20-%20Step%2001.png|center|114x114px]] |
| − | #** Save - the system will save the | + | #**Save - the system will save the Purchase Transaction and will redirect the user to Purchase Module Menu |
| − | #** Save and New - the system will save the | + | #**Save and New - the system will save the Purchase Transaction and will redirect the user to Create Purchase Menu |
| − | #** Save and Preview - the system will save the | + | #**Save and Preview - the system will save the Purchase Transaction and will redirect the user on viewing the Purchase Transaction. |
| − | #** Save and Pay - the system will save the | + | #**Save and Pay - the system will save the Purchase Transaction and will redirect the user on Issue Payments Menu |
| − | ====== Printing Purchase Transaction ====== | + | ======Printing Purchase Transaction====== |
| − | # Under Main Menu, Click '''Purchase''' | + | #Under Main Menu, Click '''[[Pro Purchase|Purchase]]'''[[File:Pro Purchase Module (Create) - Step 01.png|link=https://docs.oojeema.com/File:Pro%20Purchase%20Module%20(Create)%20-%20Step%2001.png|center|950x950px]] |
| − | # <span class="ve-pasteProtect" style="color: rgb(51, 51, 51)" data-ve-attributes="{"style":"color: rgb(51, 51, 51)"}">Under Purchase Menu, Select a Purchase Transaction that needs to print its Details, click the drop-down button then choose</span> '''Print''' | + | #<span class="ve-pasteProtect" style="color: rgb(51, 51, 51)" data-ve-attributes="{"style":"color: rgb(51, 51, 51)"}">Under Purchase Menu, Select a Purchase Transaction that needs to print its Details, click the drop-down button then choose</span> '''Print'''[[File:Pro Purchase Module (Print) - Step 02.png|center|181x181px]]<br /> |
| − | ====== Issuing Payment on Purchase Transaction ====== | + | ======Issuing Payment on Purchase Transaction====== |
| − | # Under Main Menu, Click '''Purchase''' | + | #Under Main Menu, Click '''[[Pro Purchase|Purchase]]'''[[File:Pro Purchase Module (Create) - Step 01.png|link=https://docs.oojeema.com/File:Pro%20Purchase%20Module%20(Create)%20-%20Step%2001.png|center|950x950px]] |
| − | # <span style="color: rgb(51, 51, 51)">Under Purchase Menu, Select a Purchase Transaction that needs to issue its payments, click the drop-down button then choose</span> '''Issue Payment''' | + | #<span style="color: rgb(51, 51, 51)">Under Purchase Menu, Select a Purchase Transaction that needs to issue its payments, click the drop-down button then choose</span> '''[[Pro Issue Payment|Issue Payment]]'''[[File:Pro Purchase Module (Issue Payment) - Step 02.png|center|181x181px]]<br /> |
| − | # <span style="color: rgb(51, 51, 51)">Under Issue Payment Menu, fill up the necessary fields and click Save</span> | + | #<span style="color: rgb(51, 51, 51)">Under Issue Payment Menu, fill up the necessary fields and click Save</span>[[File:Pro Purchase Module (Issue Payment) - Step 03.png|center|950x950px]]<br /> |
| − | ====== Cancelling Purchase Transaction ====== | + | ======Cancelling Purchase Transaction====== |
| − | # <span style="color: rgb(51, 51, 51)">Under Main Menu, Click Purchase</span> | + | #<span style="color: rgb(51, 51, 51)">Under Main Menu, Click '''[[Pro Purchase|Purchase]]'''</span>[[File:Pro Purchase Module (Create) - Step 01.png|link=https://docs.oojeema.com/File:Pro%20Purchase%20Module%20(Create)%20-%20Step%2001.png|center|950x950px]] |
| − | # <span style="color: rgb(51, 51, 51)">Under Purchase Menu, Select a Purchase Transaction that needs to cancel, click the drop-down button then choose</span> '''Cancel''' | + | #<span style="color: rgb(51, 51, 51)">Under Purchase Menu, Select a Purchase Transaction that needs to cancel, click the drop-down button then choose</span> '''Cancel'''[[File:Pro Purchase Module (Cancel) - Step 02.png|center|181x181px]]<br /> |
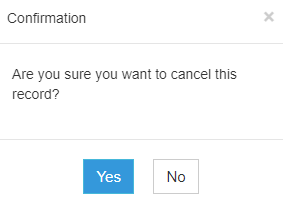
| − | # <span style="color: rgb(51, 51, 51)">Click Yes to proceed in cancelling the Purchase Transaction</span> | + | #<span style="color: rgb(51, 51, 51)">Click Yes to proceed in cancelling the Purchase Transaction</span>[[File:Pro Sales Invoice (Cancel) - Step 03.png|link=https://docs.oojeema.com/File:Pro%20Sales%20Invoice%20(Cancel)%20-%20Step%2003.png|center|283x283px]]<br /> |
| − | ===== Managing Imports and Exports of Purchase ===== | + | =====Managing Imports and Exports of Purchase===== |
| − | ====== Exporting Purchases ====== | + | ======Exporting Purchases====== |
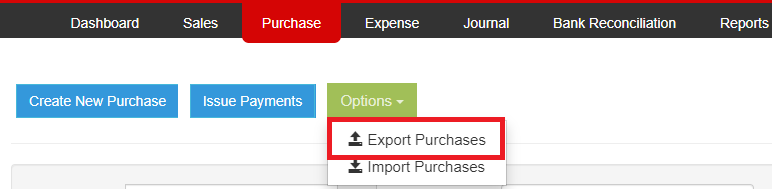
| − | # <span class="ve-pasteProtect" style="color: rgb(51, 51, 51)" data-ve-attributes="{"style":"color: rgb(51, 51, 51)"}">Under Main Menu, Click Purchase</span> | + | #<span class="ve-pasteProtect" style="color: rgb(51, 51, 51)" data-ve-attributes="{"style":"color: rgb(51, 51, 51)"}">Under Main Menu, Click '''[[Pro Purchase|Purchase]]'''</span>[[File:Pro Purchase Module (Create) - Step 01.png|link=https://docs.oojeema.com/File:Pro%20Purchase%20Module%20(Create)%20-%20Step%2001.png|center|950x950px]] |
| − | # <span style="color: rgb(51, 51, 51)">Under Purchase Menu, Click Options then choose</span> '''Export | + | #<span style="color: rgb(51, 51, 51)">Under Purchase Menu, Click Options then choose</span> '''Export Purchase'''[[File:Pro Purchase Module (Export Purchase) - Step 02.png|center|772x772px]] |
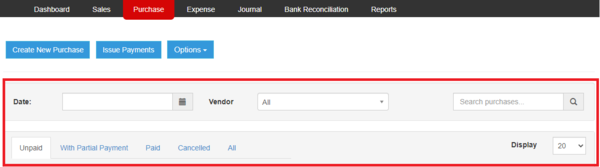
| − | #* <span style="color: rgb(51, 51, 51)">Take note that the user has an option to use the record filters for precise exporting of records</span> | + | #*<span style="color: rgb(51, 51, 51)">Take note that the user has an option to use the record filters for precise exporting of records</span>[[File:Pro Purchase Module (Export Purchase) - Step 02.1.png|center|600x600px]]<br /> |
| − | ====== Importing Purchases ====== | + | ======Importing Purchases====== |
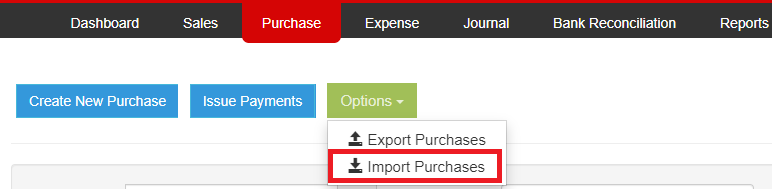
| − | # <span style="color: rgb(51, 51, 51)">Under Main Menu, Click <span>Purchase</span></span> | + | #<span style="color: rgb(51, 51, 51)">Under Main Menu, Click <span>'''[[Pro Purchase|Purchase]]'''</span></span>[[File:Pro Purchase Module (Create) - Step 01.png|link=https://docs.oojeema.com/File:Pro%20Purchase%20Module%20(Create)%20-%20Step%2001.png|center|950x950px]] |
| − | # <span style="color: rgb(51, 51, 51)">Under Sales Menu, Click Options then choose</span> '''Import Purchase''' | + | #<span style="color: rgb(51, 51, 51)">Under Sales Menu, Click Options then choose</span> '''Import Purchase'''[[File:Pro Purchase Module (Import Purchase) - Step 02.png|center|772x772px]]<br /> |
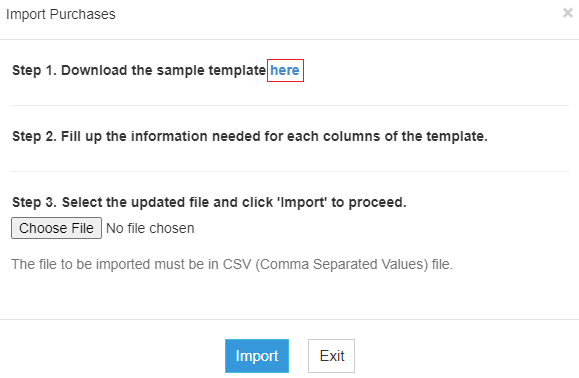
| − | # <span style="color: rgb(51, 51, 51)">Download the Template in the Link provided</span> | + | #<span style="color: rgb(51, 51, 51)">Download the Template in the Link provided</span>[[File:Pro Purchase Module (Import Purchase) - Step 03.png|center|579x579px]]<br /> |
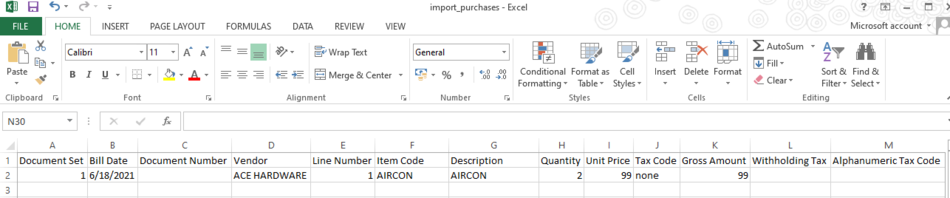
| − | # <span style="color: rgb(51, 51, 51)">Fill out the Template</span> | + | #<span style="color: rgb(51, 51, 51)">Fill out the Template</span>[[File:Pro Purchase Module (Import Purchase) - Step 04.png|center|950x950px]]<br /> |
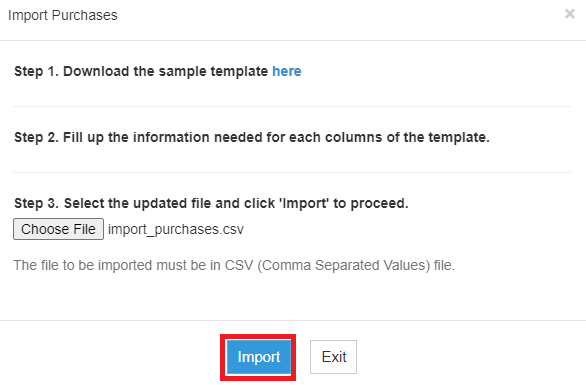
| − | # <span style="color: rgb(51, 51, 51)">Attach the Template then Click</span> '''Import.''' | + | #<span style="color: rgb(51, 51, 51)">Attach the Template then Click</span> '''Import.'''[[File:Pro Purchase Module (Import Purchase) - Step 05.png|center|586x586px]]<br /> |
| − | ===== Issuing Payments on Purchase Module ===== | + | =====Issuing Payments on Purchase Module===== |
| − | # <span class="ve-pasteProtect" style="color: rgb(51, 51, 51)" data-ve-attributes="{"style":"color: rgb(51, 51, 51)"}">Under Main Menu, Click '''Purchase'''</span> | + | #<span class="ve-pasteProtect" style="color: rgb(51, 51, 51)" data-ve-attributes="{"style":"color: rgb(51, 51, 51)"}">Under Main Menu, Click '''[[Pro Purchase|Purchase]]'''</span>[[File:Pro Purchase Module (Create) - Step 01.png|link=https://docs.oojeema.com/File:Pro%20Purchase%20Module%20(Create)%20-%20Step%2001.png|center|950x950px]] |
| − | # <span class="ve-pasteProtect" style="color: rgb(51, 51, 51)" data-ve-attributes="{"style":"color: rgb(51, 51, 51)"}">Under Purchase Menu, Click Issue Payments</span> | + | #<span class="ve-pasteProtect" style="color: rgb(51, 51, 51)" data-ve-attributes="{"style":"color: rgb(51, 51, 51)"}">Under Purchase Menu, Click '''[[Pro Issue Payment|Issue Payments]]'''</span>[[File:Pro Purchase Module (Import) - Step 02.png|center|770x770px]]<br /> |
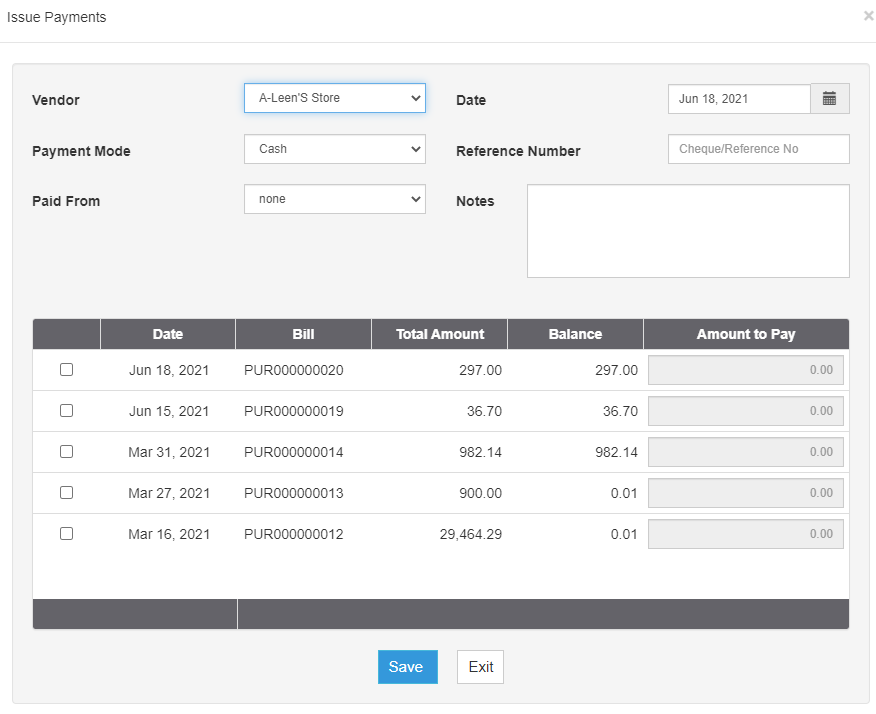
| − | # <span style="color: rgb(51, 51, 51)">Fill up the necessary fields and choose the | + | #<span style="color: rgb(51, 51, 51)">Fill up the necessary fields and choose the Purchase Transactions that needs to be paid</span>[[File:Pro Purchase Module (Issue Payments) - Step 03.png|center|876x876px]]<br /> |
| − | # Click Save <br /> | + | #Click Save <br /> |
| − | <br /> | + | {| class="wikitable" style="box-sizing: inherit; border-collapse: collapse; border-spacing: 0px; background-color: rgb(248, 249, 250); font-size: 14px; color: rgb(34, 34, 34); margin: 1em 0px; border: 1px solid rgb(162, 169, 177); font-family: "Open Sans", Roboto, arial, sans-serif; font-style: normal; font-variant-ligatures: normal; font-variant-caps: normal; font-weight: 400; letter-spacing: normal; orphans: 2; text-align: start; text-transform: none; white-space: normal; widows: 2; word-spacing: 0px; -webkit-text-stroke-width: 0px; text-decoration-thickness: initial; text-decoration-style: initial; text-decoration-color: initial;" |
| + | |+ style="box-sizing: inherit; padding-top: 8px; padding-bottom: 8px; color: rgb(119, 119, 119); text-align: left; font-weight: bold;" |Categories: | ||
| + | ! colspan="2" style="background-color:rgb(234, 236, 240);text-align:center;" |'''Modules''' | ||
| + | |- style="box-sizing: inherit;" | ||
| + | | style="" |Purchase | ||
| + | | style="" |[[Pro Purchase|Purchase]]<nowiki> | </nowiki>[[Pro Purchase Order|Purchase Order]]<nowiki> | </nowiki>[[Pro Issue Payment|Issue Payment]] | ||
| + | |- style="box-sizing: inherit;" | ||
| + | | style="" |Maintenance | ||
| + | | style="" |[[Pro Chart of Account|Chart of Account]]<nowiki> | </nowiki>[[Pro Vendors|Vendors]]<nowiki> | </nowiki>[[Pro Items|Items]]<nowiki> | </nowiki>[[Pro Tax|Tax]] | ||
| + | |- style="box-sizing: inherit;" | ||
| + | | style="" |Reports | ||
| + | | style="" |[[Pro Purchase Journal|Purchase Journal]]<nowiki> | </nowiki>[[Pro Purchase Relief|Purchase Relief]] | ||
| + | |- style="box-sizing: inherit;" | ||
| + | | colspan="2" style="vertical-align:middle;text-align:center;" |'''Job Aid Modules''' | ||
| + | |- style="box-sizing: inherit;" | ||
| + | | style="" |Purchase Aids | ||
| + | | style="" |[[Oojeema Pro Purchase Job Aids|Purchase Job Aids]] | ||
| + | |- style="box-sizing: inherit;" | ||
| + | | style="" |Maintenance Aids | ||
| + | | style="" |[[Oojeema Pro Chart of Accounts Job Aids|Chart of Accounts Job Aids]] <span style="box-sizing: inherit;"><nowiki>| </nowiki>[[Oojeema Pro Vendors Job Aids|Vendors Job Aids]]</span><nowiki> | </nowiki>[[Oojeema Pro Items Job Aids|Items Job Aids]]<nowiki> | </nowiki>[[Oojeema Pro Tax Job Aids|Tax Job Aids]] | ||
| + | |- style="box-sizing: inherit;" | ||
| + | | style="" |Reports Aids | ||
| + | | style="" |[[Pro Purchase Journal Job Aids|Purchase Journal Job Aids]]<nowiki> | </nowiki>[[Pro Purchase Relief Job Aids|Purchase Relief Job Aids]] | ||
| + | |}<br /> | ||
Latest revision as of 11:55, 2 August 2021
Contents
Purchase Module Job Aids
Managing Purchase No.
Creating Purchase Transaction
- Under Main Menu, Click Purchase

- Under Purchase Menu, Click Create New Purchase

- Fill up the necessary fields on the Header Part
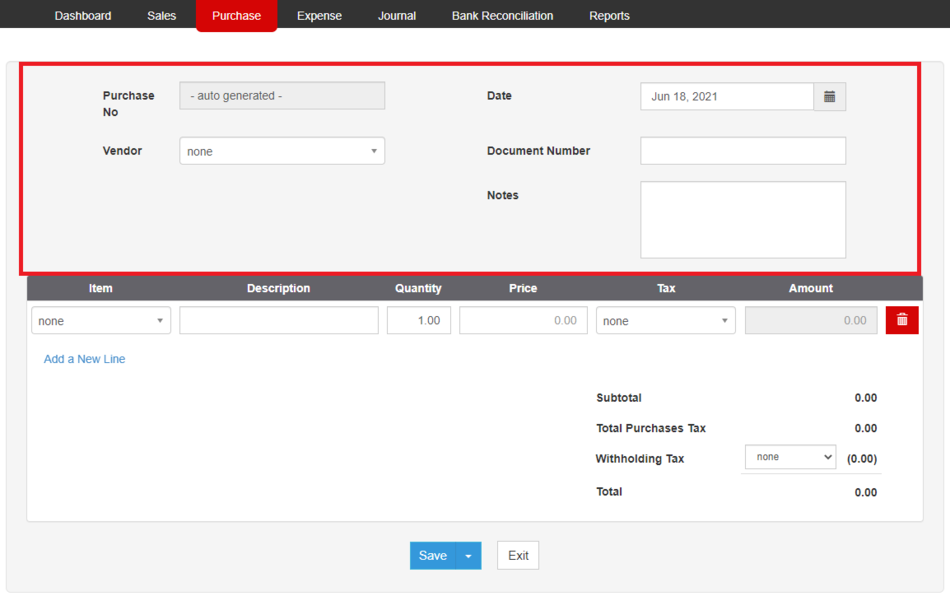
- Take Note that the Vendor field is required for this transaction
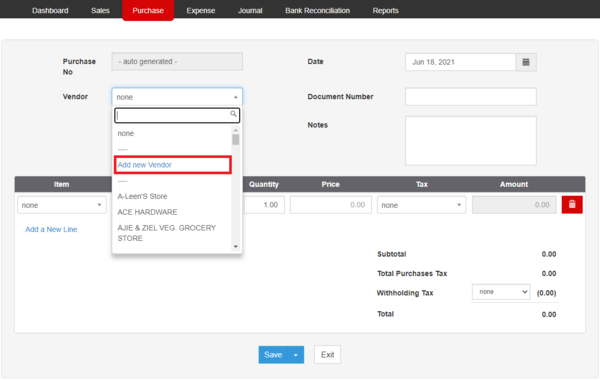
- User can add a Vendor under Vendor field by clicking the Drop-down arrow then choose Add New Vendor
- Make sure to fill up the required fields in order to create new Vendor.
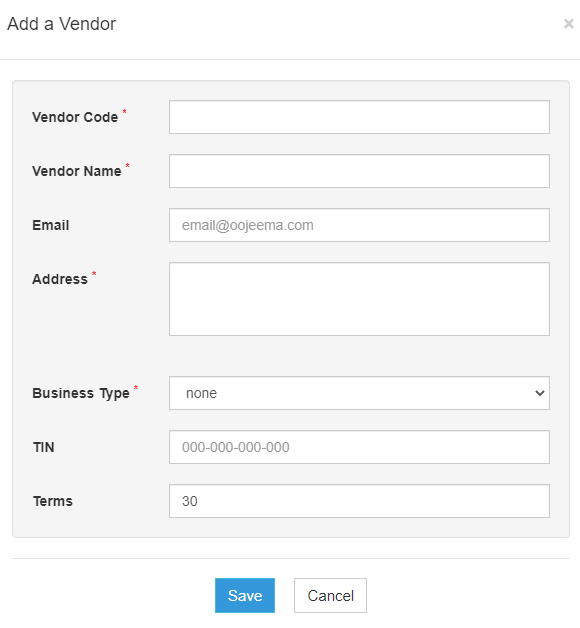
- Make sure to fill up the required fields in order to create new Vendor.
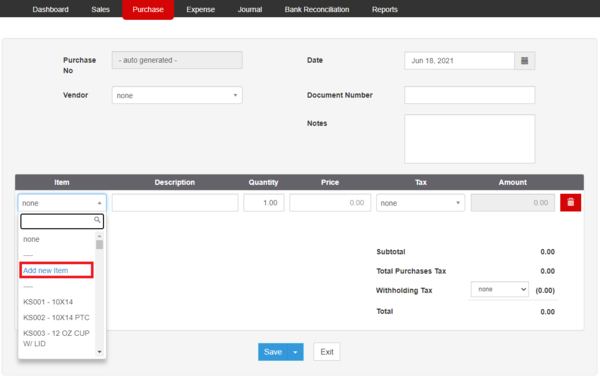
- Fill up the Item Field
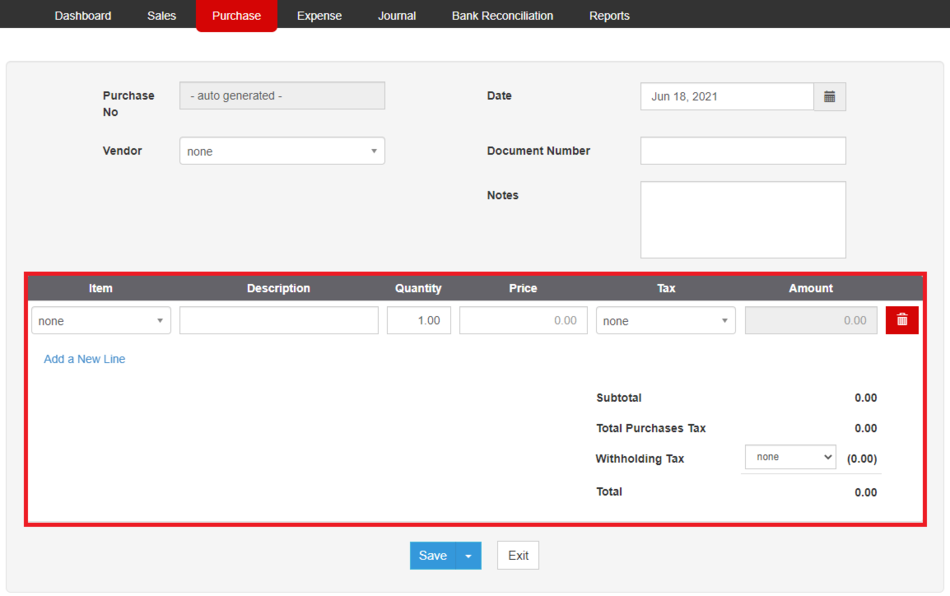
- Make sure to fill up the required fields in order to create an Item record
- Take Note that it requires at least one item in order for the transaction to proceed
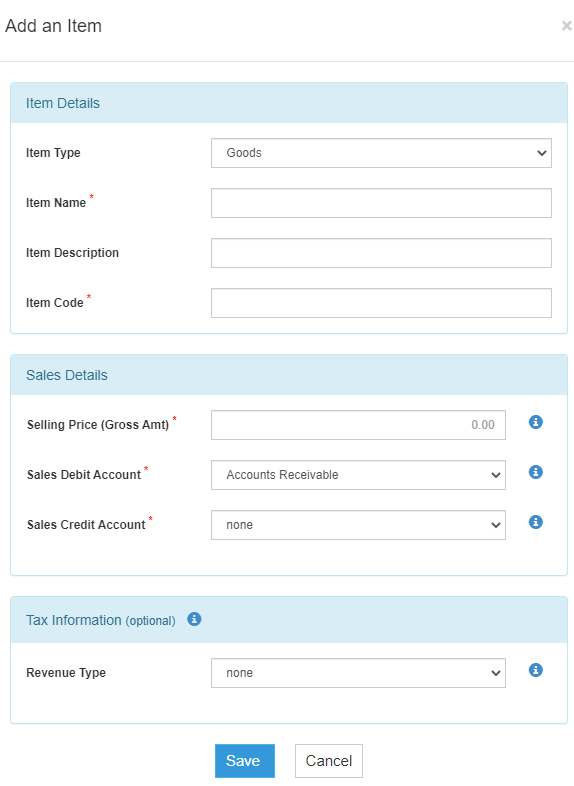
- User can add an Item under Item field by clicking the Drop-down arrow then choose Add New Item
- Make sure to fill up the required fields in order to create an Item record
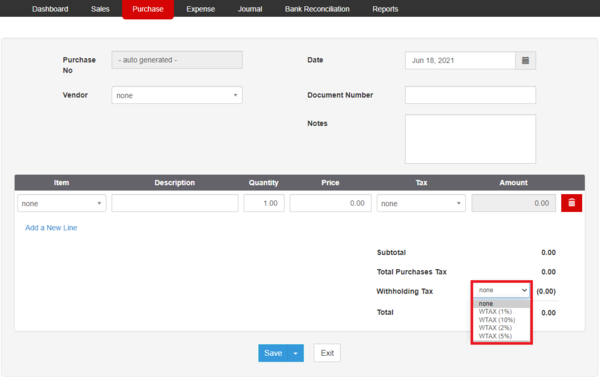
- User has an option to apply the withholding task by clicking the dropdown arrow on the Withholding tax field.
- Make sure to fill up the required fields in order to create an Item record
- Click Save
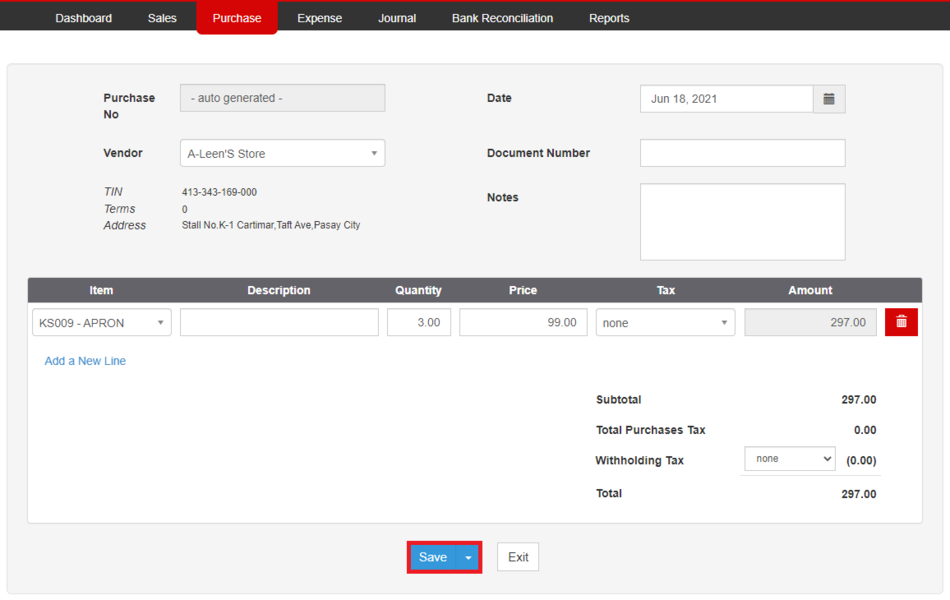
- User has an option on how the Invoice will be save. Below are the following options on saving an Invoice
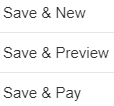
- Save - the system will save the Purchase Transaction and will redirect the user to Purchase Module Menu
- Save and New - the system will save the Purchase Transaction and will redirect the user to Create Purchase Menu
- Save and Preview - the system will save the Purchase Transaction and will redirect the user on viewing the Purchase Transaction.
- Save and Pay - the system will save the Purchase Transaction and will redirect the user on Issue Payments Menu
- User has an option on how the Invoice will be save. Below are the following options on saving an Invoice
_-_Step_01.png)
_-_Step_02.png)
_-_Step_03.png)
_-_Step_01.png)
_-_Step_02.png)
_-_Step_04.png)
%20-%20Step%2001.png)
%20-%20Step%2002.png)
_-_Step_01.png)
_-_Step_05.png)
%20-%20Step%2001.png)
Viewing Purchase Transaction
- Under Main Menu, Click Purchase
- Under Purchase Menu, Select a Purchase Transaction that needs to view its Details, click the drop-down button then choose View
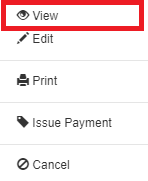
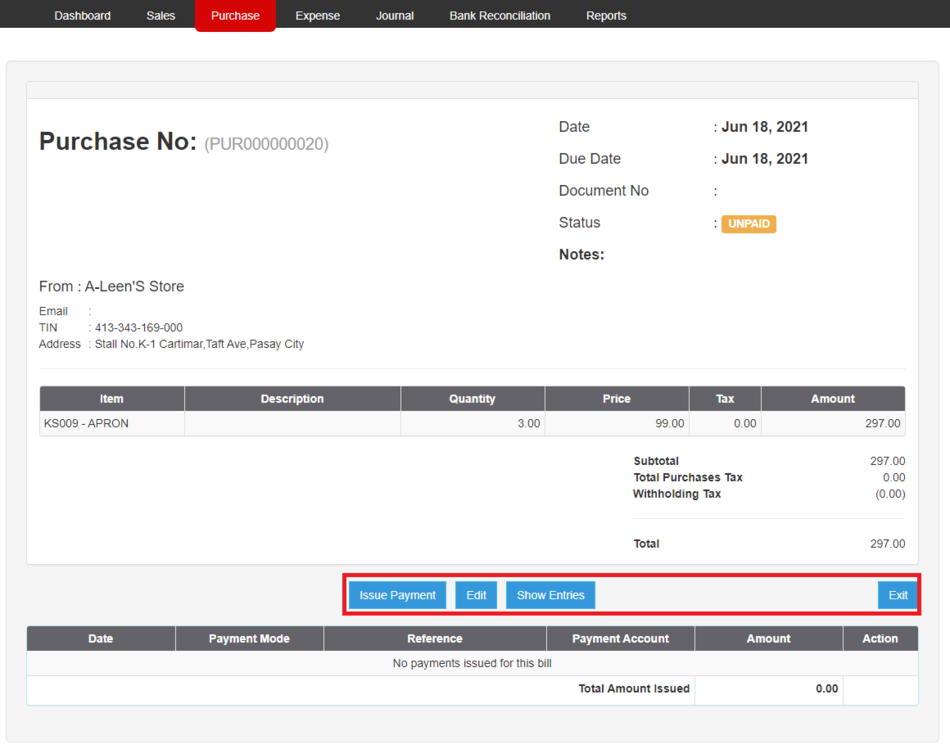
- Under view Purchase, the user has an option to Issue Payment, Edit, Show its entries or Exit the Transaction
%20-%20Step%2001.png)
_-_Step_02.png)
_-_Step_03.png)
Editing Purchase Transaction
- Under Main Menu, Click Purchase
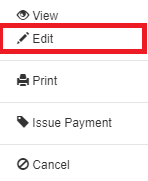
- Under Purchase Menu, Select a Purchase Transaction that needs to update its Details, click the drop-down button then choose Edit
- Update the necessary fields
- Click Save
- User has an option on how the Invoice will be save. Below are the following options on saving an Invoice
- Save - the system will save the Purchase Transaction and will redirect the user to Purchase Module Menu
- Save and New - the system will save the Purchase Transaction and will redirect the user to Create Purchase Menu
- Save and Preview - the system will save the Purchase Transaction and will redirect the user on viewing the Purchase Transaction.
- Save and Pay - the system will save the Purchase Transaction and will redirect the user on Issue Payments Menu
- User has an option on how the Invoice will be save. Below are the following options on saving an Invoice
_-_Step_02.png)
Printing Purchase Transaction
- Under Main Menu, Click Purchase
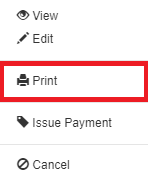
- Under Purchase Menu, Select a Purchase Transaction that needs to print its Details, click the drop-down button then choose Print
_-_Step_02.png)
Issuing Payment on Purchase Transaction
- Under Main Menu, Click Purchase
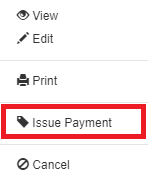
- Under Purchase Menu, Select a Purchase Transaction that needs to issue its payments, click the drop-down button then choose Issue Payment
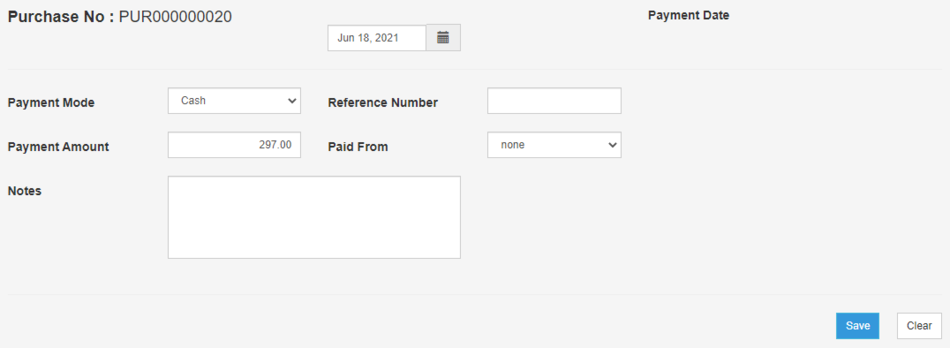
- Under Issue Payment Menu, fill up the necessary fields and click Save
_-_Step_02.png)
_-_Step_03.png)
Cancelling Purchase Transaction
- Under Main Menu, Click Purchase
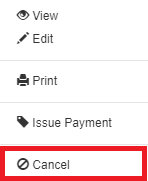
- Under Purchase Menu, Select a Purchase Transaction that needs to cancel, click the drop-down button then choose Cancel
- Click Yes to proceed in cancelling the Purchase Transaction
_-_Step_02.png)
%20-%20Step%2003.png)
Managing Imports and Exports of Purchase
Exporting Purchases
- Under Main Menu, Click Purchase
- Under Purchase Menu, Click Options then choose Export Purchase
- Take note that the user has an option to use the record filters for precise exporting of records
- Take note that the user has an option to use the record filters for precise exporting of records
_-_Step_02.png)
_-_Step_02.1.png)
Importing Purchases
- Under Main Menu, Click Purchase
- Under Sales Menu, Click Options then choose Import Purchase
- Download the Template in the Link provided
- Fill out the Template
- Attach the Template then Click Import.
_-_Step_02.png)
_-_Step_03.png)
_-_Step_04.png)
_-_Step_05.png)
Issuing Payments on Purchase Module
- Under Main Menu, Click Purchase
- Under Purchase Menu, Click Issue Payments

- Fill up the necessary fields and choose the Purchase Transactions that needs to be paid
- Click Save
_-_Step_02.png)
_-_Step_03.png)
| Modules | |
|---|---|
| Purchase | Purchase | Purchase Order | Issue Payment |
| Maintenance | Chart of Account | Vendors | Items | Tax |
| Reports | Purchase Journal | Purchase Relief |
| Job Aid Modules | |
| Purchase Aids | Purchase Job Aids |
| Maintenance Aids | Chart of Accounts Job Aids | Vendors Job Aids | Items Job Aids | Tax Job Aids |
| Reports Aids | Purchase Journal Job Aids | Purchase Relief Job Aids |