You are viewing an old version of this page. Return to the latest version.
Version of 11:57, 25 June 2021 by Gelo
Difference between revisions of "Oojeema Pro Price List Job Aids"
(Created page with "{{DISPLAYTITLE:Price List Job Aids}} ==<span class="mw-headline ve-pasteProtect" id="Users_Job_Aids" style="box-sizing: inherit;" data-ve-attributes="{"style":"...") (Tag: Visual edit) |
(Tag: Visual edit) |
||
| Line 1: | Line 1: | ||
{{DISPLAYTITLE:Price List Job Aids}} | {{DISPLAYTITLE:Price List Job Aids}} | ||
| + | |||
| + | <div style="text-align: center;"> | ||
| + | [[Oojeema Pro Customers Job Aids|Customers Job Aids]] | [[Oojeema Pro Items Job Aids|Items Job Aids]] | [[Oojeema Pro Price List Job Aids|Price List Job Aids]] | ||
| + | </div> | ||
==<span class="mw-headline ve-pasteProtect" id="Users_Job_Aids" style="box-sizing: inherit;" data-ve-attributes="{"style":"box-sizing: inherit;"}">Price List Job Aids</span>== | ==<span class="mw-headline ve-pasteProtect" id="Users_Job_Aids" style="box-sizing: inherit;" data-ve-attributes="{"style":"box-sizing: inherit;"}">Price List Job Aids</span>== | ||
| Line 54: | Line 58: | ||
#Under Maintenance Side Bar, Click '''Price List'''[[File:Pro Price List (Create) - Step 02.png|link=https://docs.oojeema.com/File:Pro%20Price%20List%20(Create)%20-%20Step%2002.png|center|465x465px]] | #Under Maintenance Side Bar, Click '''Price List'''[[File:Pro Price List (Create) - Step 02.png|link=https://docs.oojeema.com/File:Pro%20Price%20List%20(Create)%20-%20Step%2002.png|center|465x465px]] | ||
#Under Price List Menu, Click Options then click Export Price List[[File:Pro Price List (Export) - Step 03.png|center|950x950px|link=https://docs.oojeema.com/File:Pro_Price_List_(Export)_-_Step_03.png]] | #Under Price List Menu, Click Options then click Export Price List[[File:Pro Price List (Export) - Step 03.png|center|950x950px|link=https://docs.oojeema.com/File:Pro_Price_List_(Export)_-_Step_03.png]] | ||
| + | |||
| + | {| class="wikitable" style="box-sizing: inherit; border-collapse: collapse; border-spacing: 0px; background-color: rgb(248, 249, 250); font-size: 14px; color: rgb(34, 34, 34); margin: 1em 0px; border: 1px solid rgb(162, 169, 177); font-family: "Open Sans", Roboto, arial, sans-serif; font-style: normal; font-variant-ligatures: normal; font-variant-caps: normal; font-weight: 400; letter-spacing: normal; orphans: 2; text-align: start; text-transform: none; white-space: normal; widows: 2; word-spacing: 0px; -webkit-text-stroke-width: 0px; text-decoration-thickness: initial; text-decoration-style: initial; text-decoration-color: initial;" | ||
| + | |+ style="box-sizing: inherit; padding-top: 8px; padding-bottom: 8px; color: rgb(119, 119, 119); text-align: left; font-weight: bold;" |Categories: | ||
| + | ! colspan="2" style="background-color:rgb(234, 236, 240);text-align:center;" |'''Modules''' | ||
| + | |- style="box-sizing: inherit;" | ||
| + | | style="" |Maintenance | ||
| + | | style="" |[[Pro Customer|Customer]]<nowiki> | </nowiki>[[Pro Items|Items]]<nowiki> | </nowiki>[[Pro Price List|Price List]] | ||
| + | |- style="box-sizing: inherit;" | ||
| + | | style="" |Sales | ||
| + | | style="" |[[Pro Sales|Sales]]<nowiki> | </nowiki>[[Pro Sales and Service Invoice|Sales and Service Invoice]]<nowiki> | </nowiki>[[Pro Receive Payments|Receive Payments]] | ||
| + | |- | ||
| + | |Purchase | ||
| + | |[[Pro Purchase|Purchase]]<nowiki> | </nowiki>[[Pro Purchase Order|Purchase Order]]<nowiki> | </nowiki>[[Pro Issue Payment|Issue Payment]] | ||
| + | |- style="box-sizing: inherit;" | ||
| + | | colspan="2" style="vertical-align:middle;text-align:center;" |'''Job Aid Modules''' | ||
| + | |- style="box-sizing: inherit;" | ||
| + | | style="" |Maintenance Aids | ||
| + | | style="" |[[Oojeema Pro Customers Job Aids|Customers Job Aids]]<nowiki> | </nowiki>[[Oojeema Pro Items Job Aids|Items Job Aids]] | ||
| + | |- style="box-sizing: inherit;" | ||
| + | | style="" |Sales Aids | ||
| + | | style="" |[[Oojeema Pro Sales Job Aids|Sales Job Aids]] | ||
| + | |- | ||
| + | |Purchase Aids | ||
| + | |[[Oojeema Pro Purchase Job Aids|Purchase Job Aids]] | ||
| + | |} | ||
Revision as of 13:10, 6 August 2021
Contents
Price List Job Aids
Managing Price List
Adding Price List
- On the Main Menu, click the Gear Icon then choose Maintenance

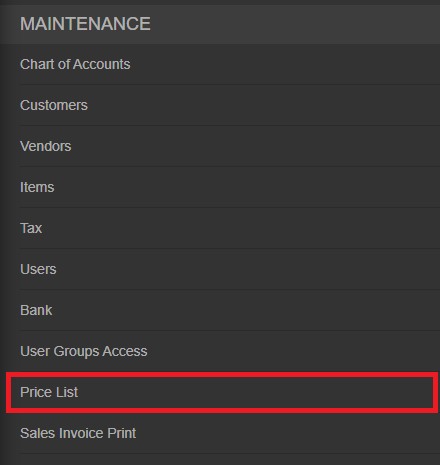
- Under Maintenance Side Bar, Click Price List
- Under Price List, Click Options then choose Add New Price List
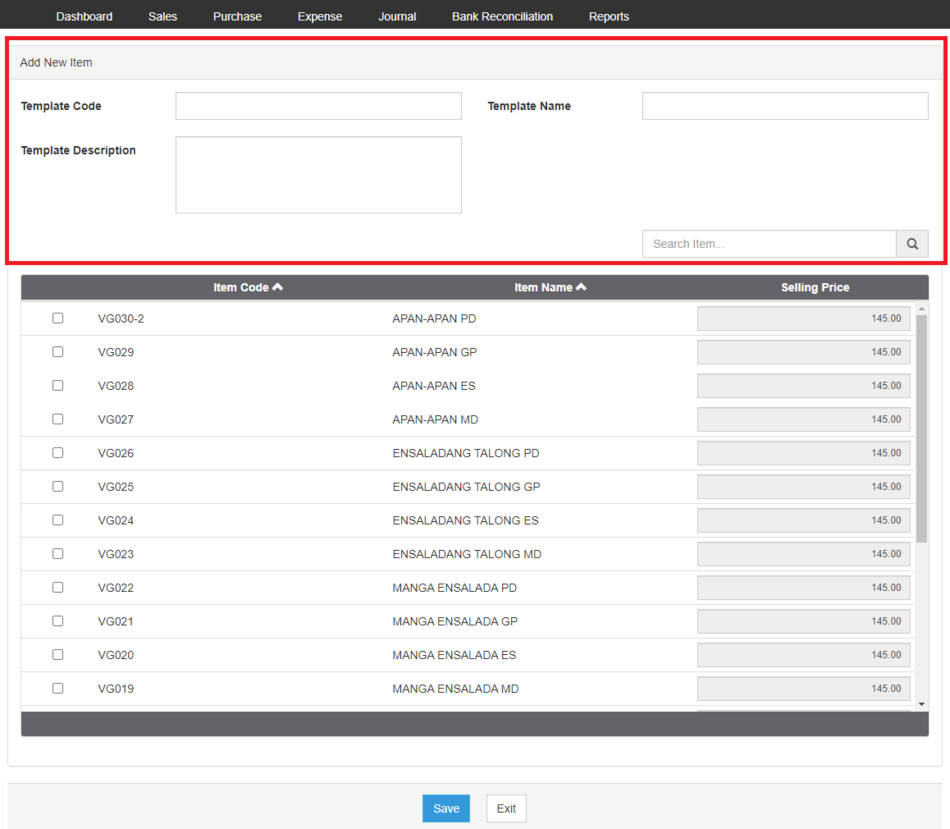
- Fill up the necessary fields in the Header Part
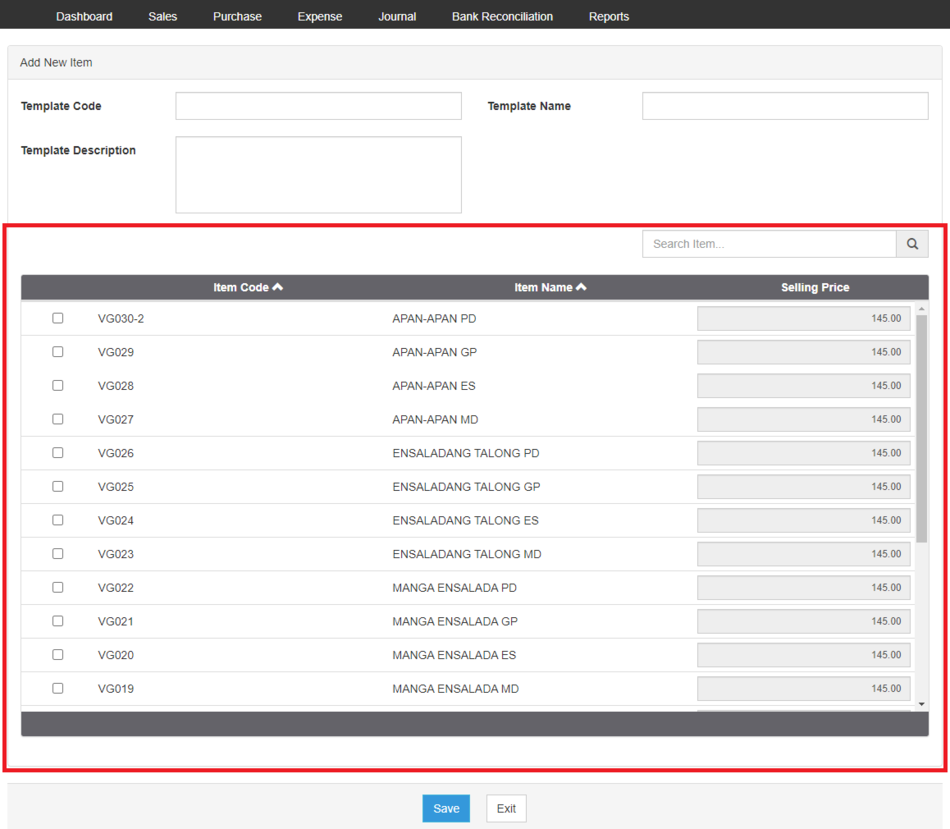
- Tick the following Items that need to modify its Price
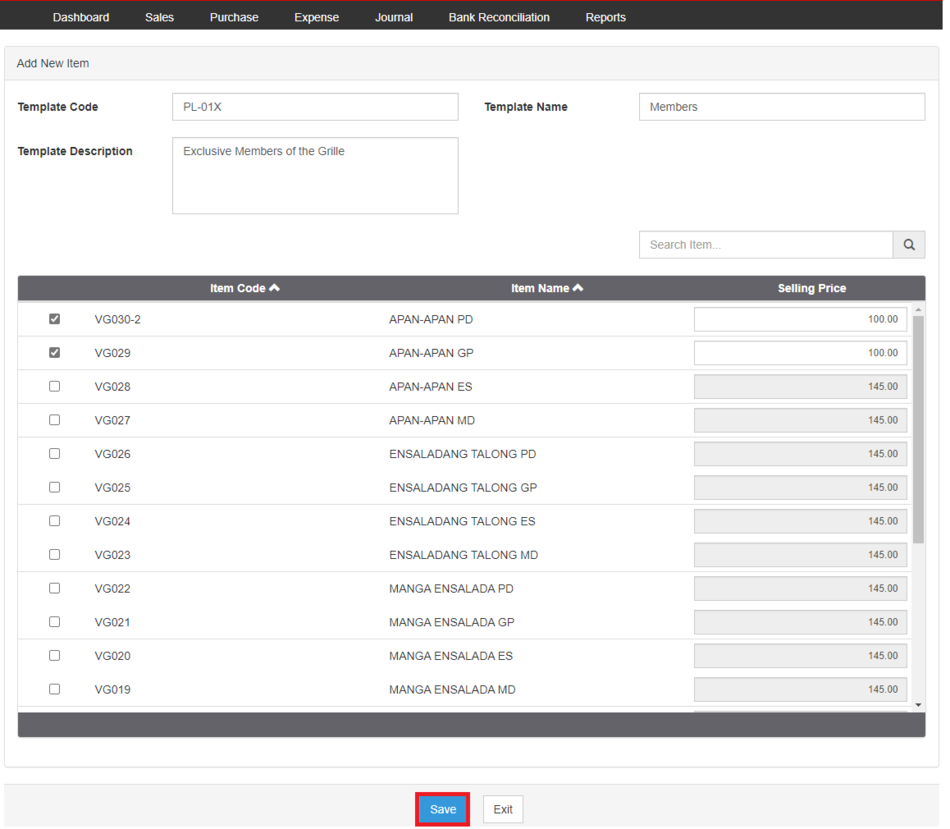
- Click Save
Viewing Price List
- On the Main Menu, click the Gear Icon then choose Maintenance

- Under Maintenance Side Bar, Click Price List
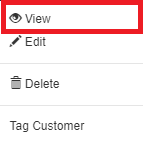
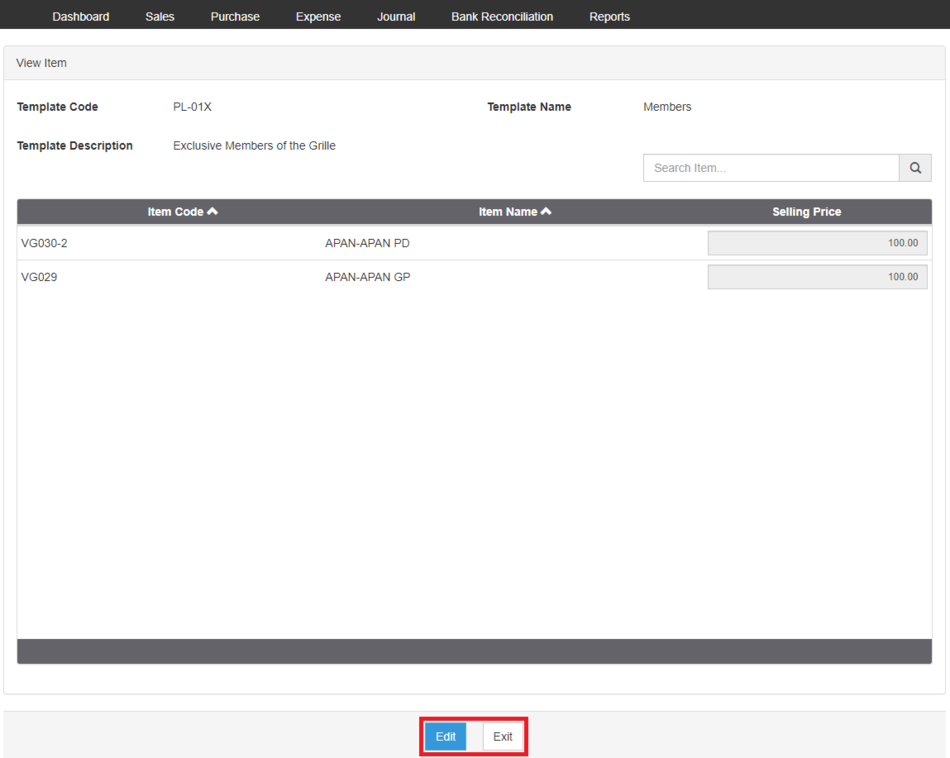
- Under Price List, Select the Price List that needs to view its details, click the drop down arrow then choose View
- User has an option to Edit the record or Exit the viewing of record
Editing Price List
- On the Main Menu, click the Gear Icon then choose Maintenance

- Under Maintenance Side Bar, Click Price List
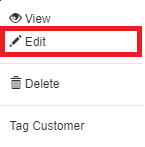
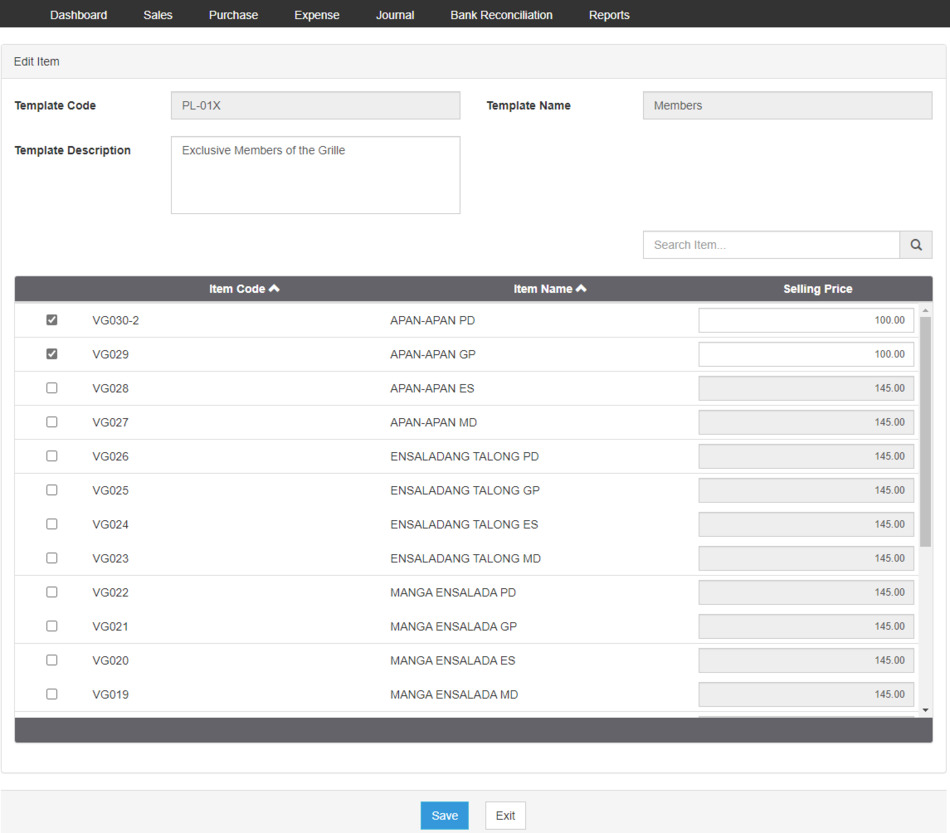
- Under Price List Menu, Select the Price List that needs to update its details, click the drop down arrow then choose Edit
- Update the necessary fields
- Click Save
Deleting Price List
- On the Main Menu, click the Gear Icon then choose Maintenance

- Under Maintenance Side Bar, Click Price List
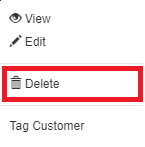
- Under Price List Menu, Select the Price List that needs to be deleted, click the drop down arrow then choose Delete
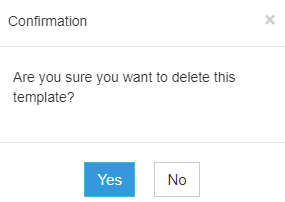
- Click Yes to Confirm the deletion process
Tagging a Customer on a Price List
- On the Main Menu, click the Gear Icon then choose Maintenance

- Under Maintenance Side Bar, Click Price List
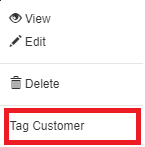
- Under Price List Menu, Select the Price List that needs to assign a Customer, click the drop down arrow then choose Tag Customer
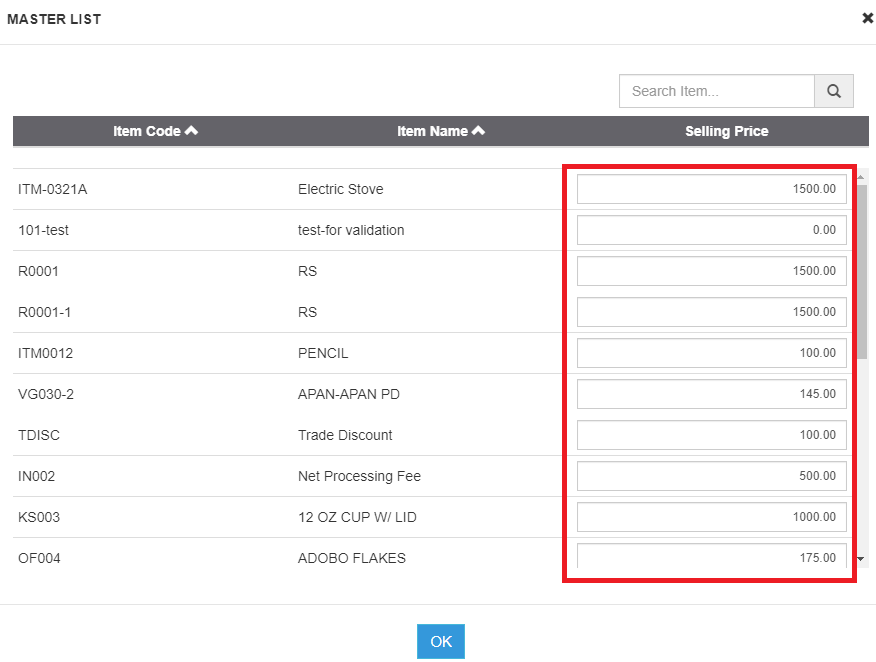
Managing Master Price List
- On the Main Menu, click the Gear Icon then choose Maintenance

- Under Maintenance Side Bar, Click Price List
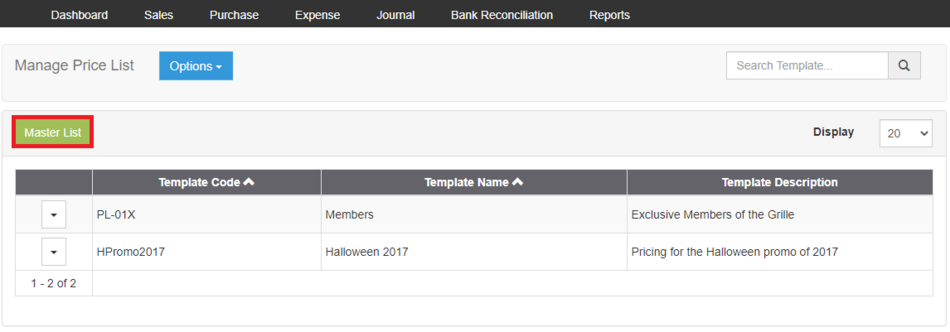
- Under Price List Menu, Click Master List
- Update the necessary prices on its corresponding fields
- Click OK
Exporting Price List
- On the Main Menu, click the Gear Icon then choose Maintenance

- Under Maintenance Side Bar, Click Price List
- Under Price List Menu, Click Options then click Export Price List
| Modules | |
|---|---|
| Maintenance | Customer | Items | Price List |
| Sales | Sales | Sales and Service Invoice | Receive Payments |
| Purchase | Purchase | Purchase Order | Issue Payment |
| Job Aid Modules | |
| Maintenance Aids | Customers Job Aids | Items Job Aids |
| Sales Aids | Sales Job Aids |
| Purchase Aids | Purchase Job Aids |
